Use a FAQ bot to answer customer queries with Landbot’s GPT-3 Integration
Access the FAQ bot template here (tutorial included) and follow the instructions. Access the FAQ demo bot here –issues courtesy of OpenAI servers may apply.
Chatbots are commonly used to answer frequently asked questions from customers. This can help reduce the manual workload for human agents by having a chatbot answer FAQs in a conversational, friendly way. In the past, this kind of chatbot experience has not always been positive. Many times, the chatbot would fail to understand the user’s intention, providing generic responses that were simply not relevant. This was a big blocker for the practical use of AI chatbots until the emergence of ChatGPT and other LLMs, but even they have their limitations, still.
GPT-3 Integration and Landbot: How to Build the Ultimate FAQ Bot
We can build a chatbot with GPT-3 and Landbot to answer frequently asked questions and summarize answers, almost like a human. This tutorial will teach you how to build it by going through the following steps:
Using an existing database of questions and answers, such as articles from a documented FAQ page or Knowledge Base articles on your website. These will serve as a source of information for the FAQ chatbot. In this example, we will use Knowledge Base articles pulled into an Airtable database.
Configuring our GPT-3 Integration inside Landbot to analyze the users’ questions and search our Knowledge Base articles for the appropriate answer.
Creating friendly and clear responses on-the-go using GPT-3.
All of this can be accomplished inside Landbot and can also be connected to other integrations, or be included in a more complex chatbot flow.
Disclaimer: OpenAI's GPT-3 has some well-known limitations, including but not limited to: low API reliability, model hallucinations, potential toxicity. Please make sure you are aware of these limitations and put mitigations in place when building your bot and before sharing it with your customers.
Let's see how we can do it:
Pre-configuration Requirements
Make sure you have an OpenAI account and its API key. (You can create your account here.) Have your API key ready to configure it later inside Landbot.
We will use Airtable our database for this tutorial. We will save our Knowledge Base articles here. You’ll need an Airtable account to create a database for this example.
Do you want to create the Airtable database yourself?
- Create four columns in your database: One for the article titles ("title"), one for the article content ("content"), one for the article tags ("tags"), and one for the article URL ("url"). - Fill in the content of the columns for each article.
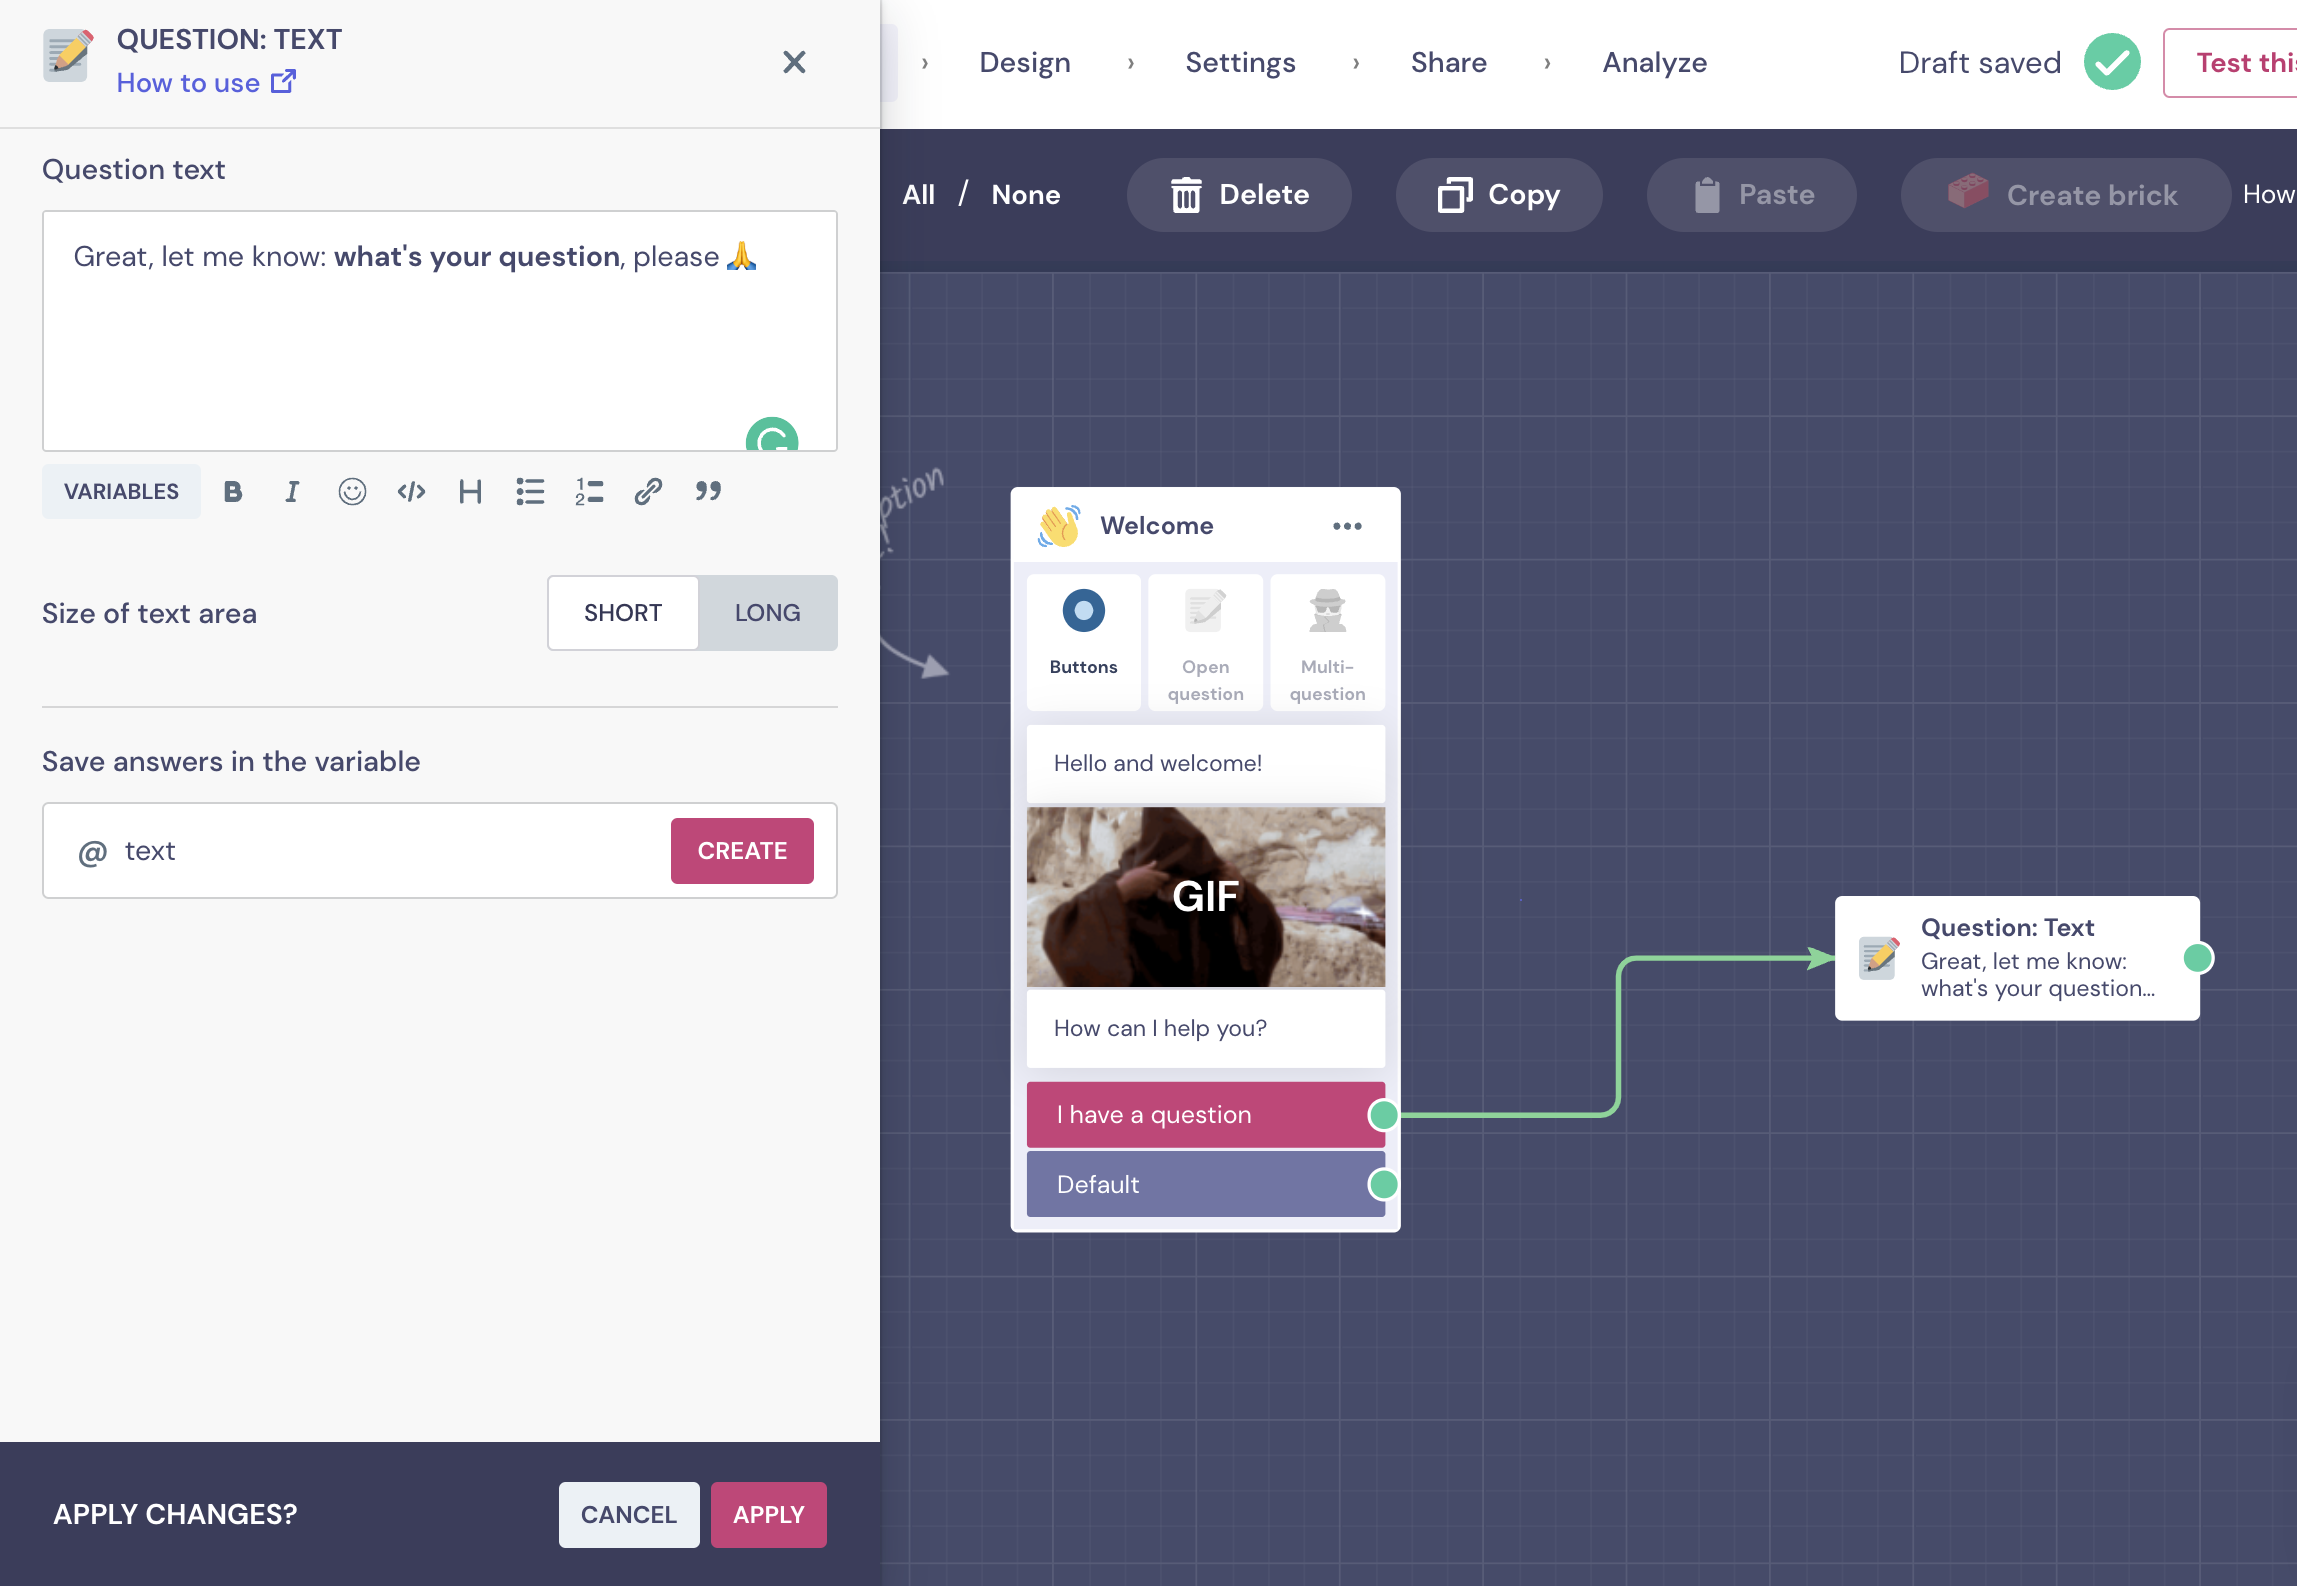
Add an open text question (Question text) to the bot, where we will ask the user “what their question is”.
Save the user's response in a variable called "text". This is the default name when creating a question.
Setting up the questions and answers database using Airtable
As indicated in step 2 of the Pre-configuration Requirements section of this tutorial, you should already have your Knowledge Base content set up in Airtable. Now we are going to connect it to Landbot so that the AI can read it.
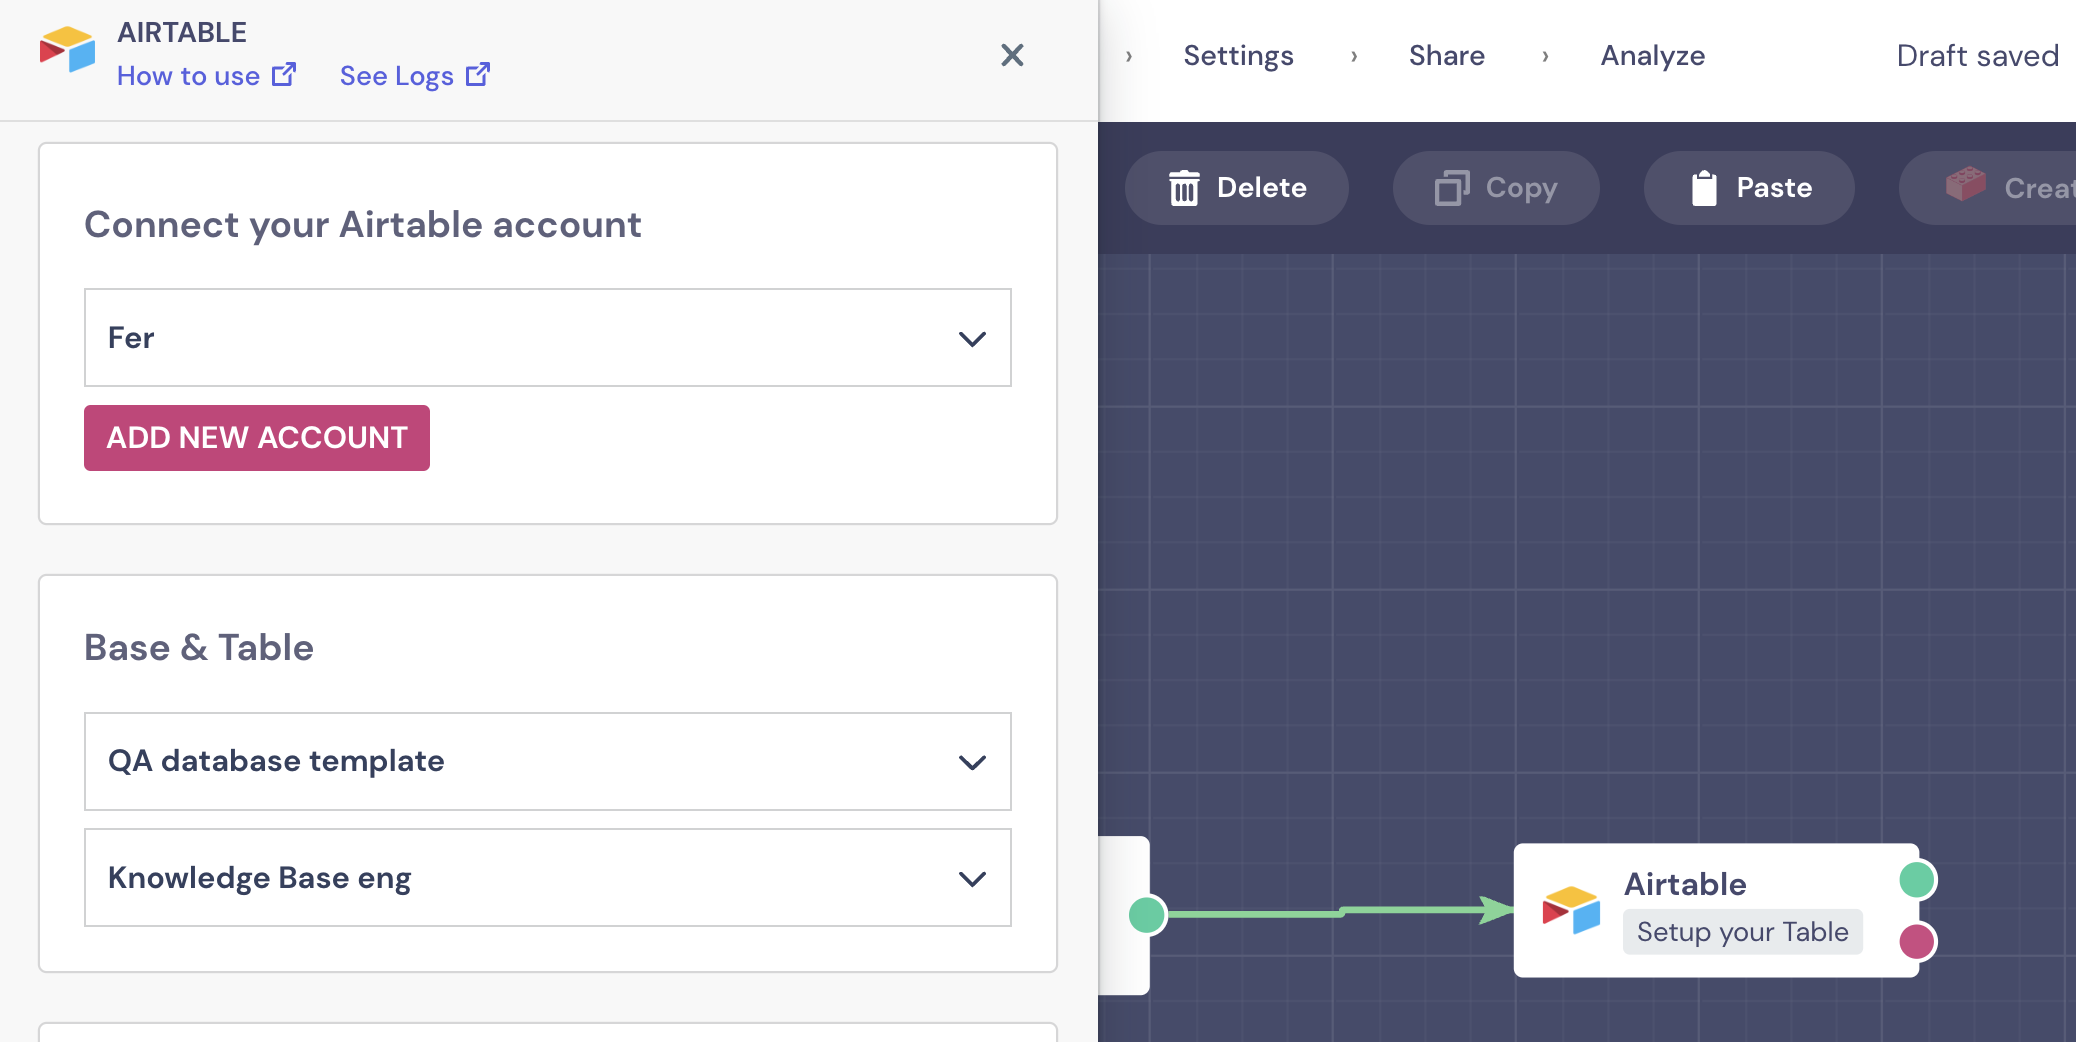
Now the time has come to connect an Airtable block and set up the base and table. This should go right after the Question text block we made, in the previous step.
Select "Get multiple records" to capture the content from the Knowledge Base articles in a Landbot variable.
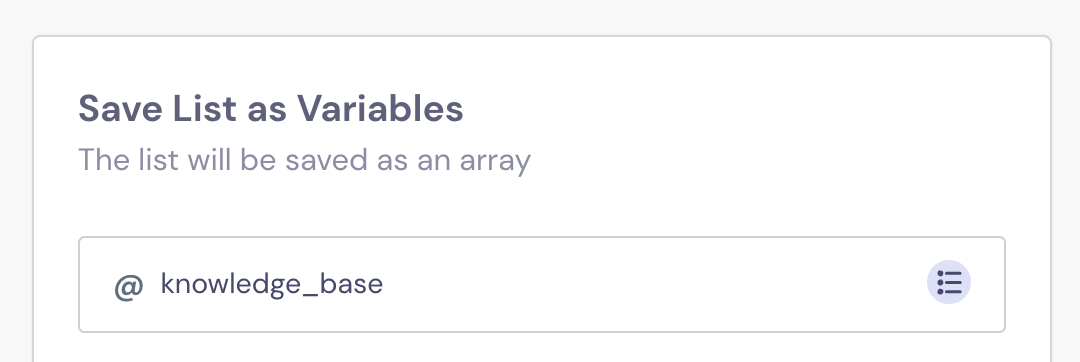
Type “knowledge_base” and save it as the variable name.
Apply the changes at the bottom.
You now have all the content from the Knowledge Base database in Airtable saved as the "knowledge_base" variable inside Landbot. This is the information GPT-3 will use to answer users’ questions.
Setting up the AI
Next, you are going to set up the AI using our GPT-3 integration so that it can understand the question and use the Airtable database that has our Knowledge Base content stored as a source of information.
Because of the GPT-3 token limit (which is currently at 4,097 tokens which includes the question prompt and completion data), this approach will only work for an estimated 10 Knowledge Base articles.
What can I do if my Knowledge Base is bigger?
There are several approaches to deal with large Knowledge Base content—e will create an advanced tutorial to cover this in the future. Among these approaches:
- Use a less expensive, less restrictive LLM (like cohere.ai) to match the user question with the right Knowledge Base article containing the answer, and then use GPT-3 to summarize the answer.
- Or just ask the user which category the question falls under so that you can filter the Knowledge Base articles to reduce their size.
- Or you can fine-tune a GPT-3 model so that you don’t need to send all of your Knowledge Base content to OpenAI. With this approach, you can skip the Airtable section of this article.
Right after the Airtable block, create three text variables by connecting three set variable blocks in a row.
In the first set variable block, save your Open AI API key in the variable "openai_apikey".
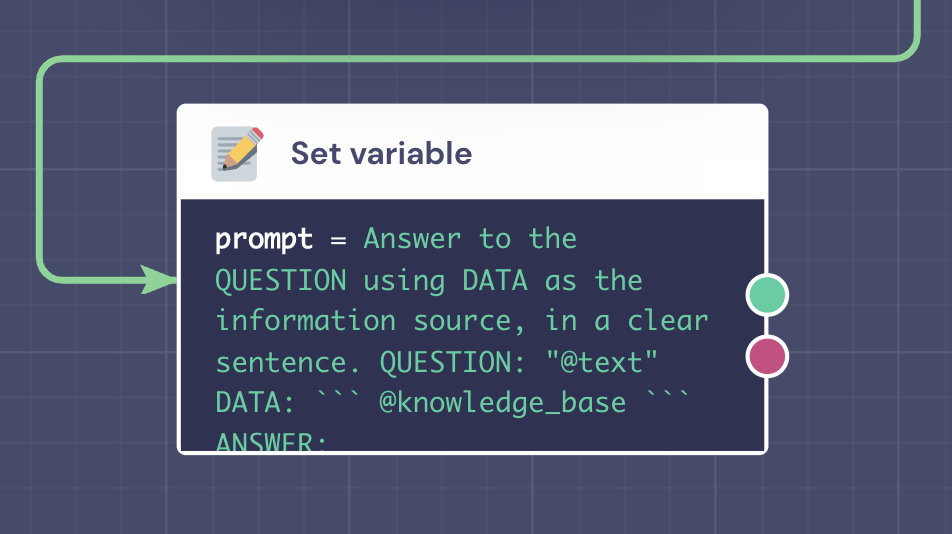
In the second "set variable", write a prompt for how you want GPT-3 to understand the question, use the Knowledge Base content and prepare a response. Save it in the variable "prompt". For the prompt copy the following text:
Answer the QUESTION using DATA as the information source, in a clear sentence.
It's very important to use the variable names mentioned above to avoid flow errors
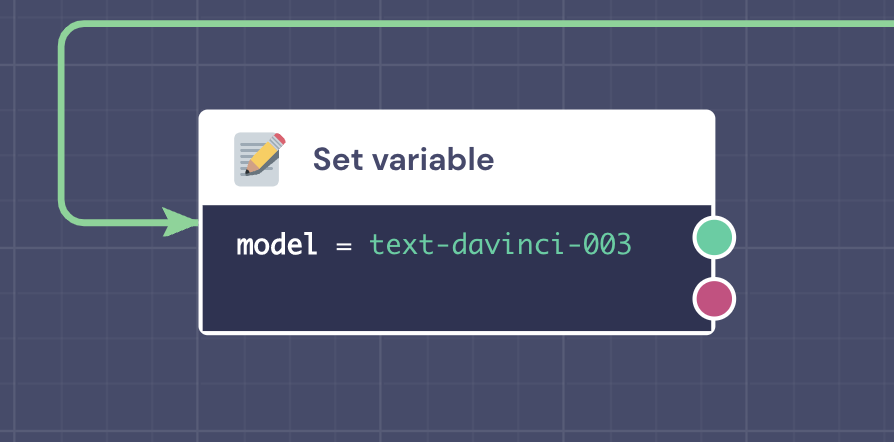
On the third "set variable" block, configure the GPT-3 model that you’ll use for the request. In this case, the variable name will be "model" and its content will be "gpt-3.5-turbo-instruct" *Bonus: You can use other models within the list of available GPT-3 models, or even train one by yourself to reduce costs.
Integrating GPT-3
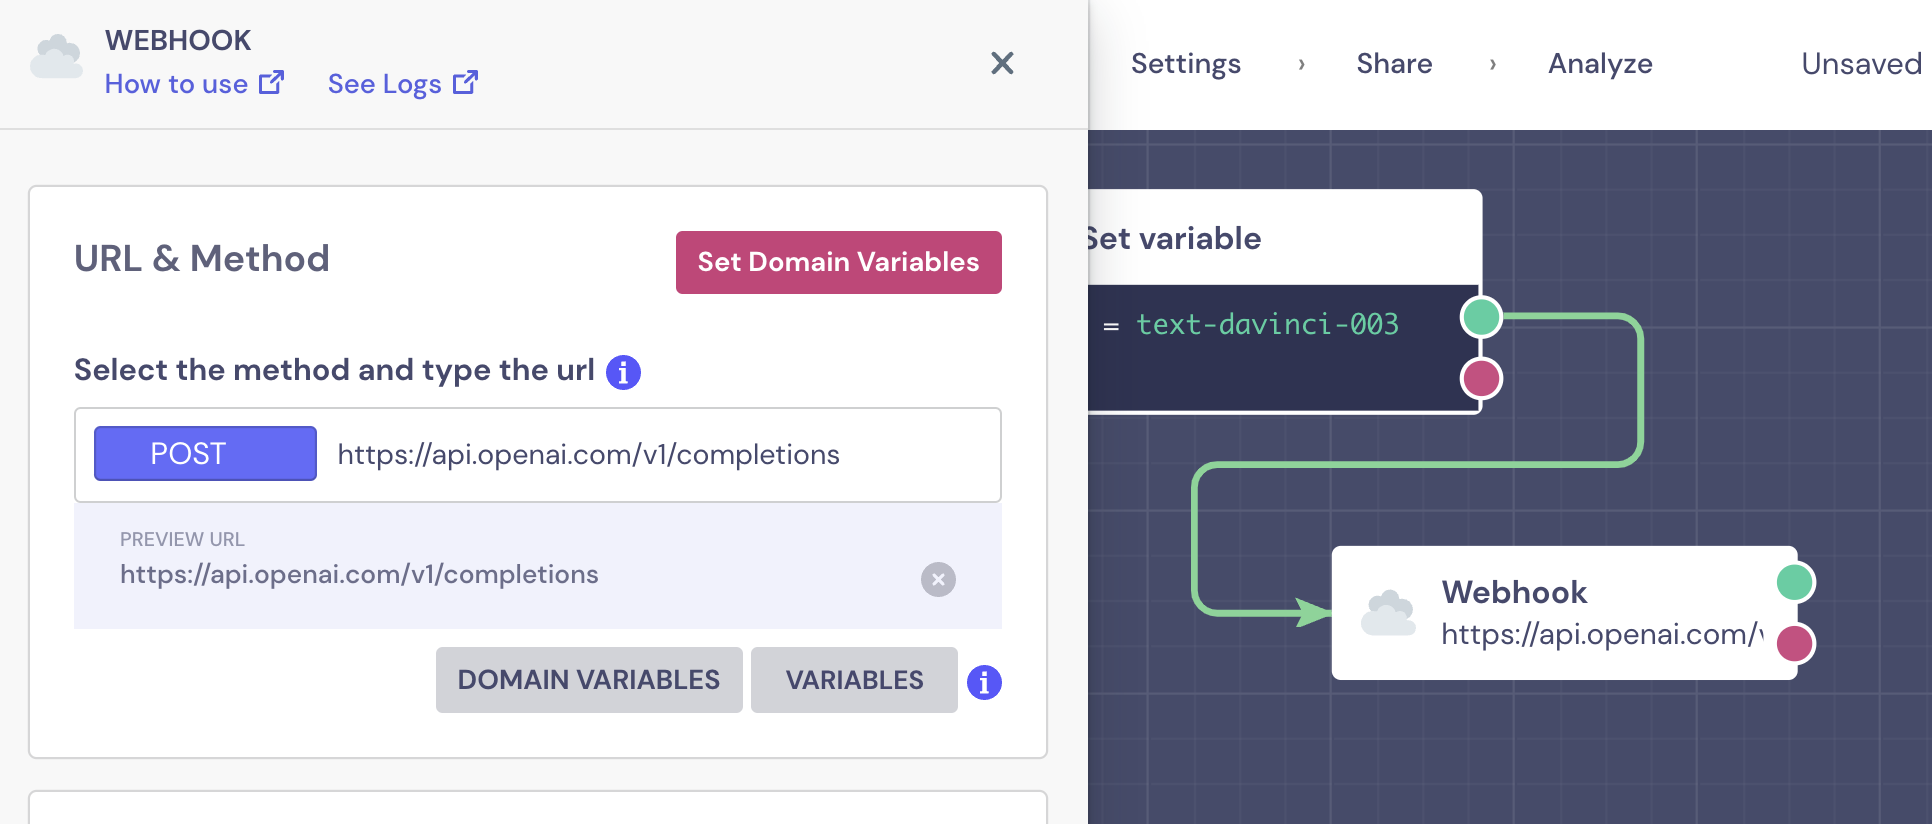
Finally, set up our GPT-3 integration using Landbot’s webhook block and the configuration values already defined.
Add the webhook block connected to the final set variable block (the “model” variable name) mentioned above.
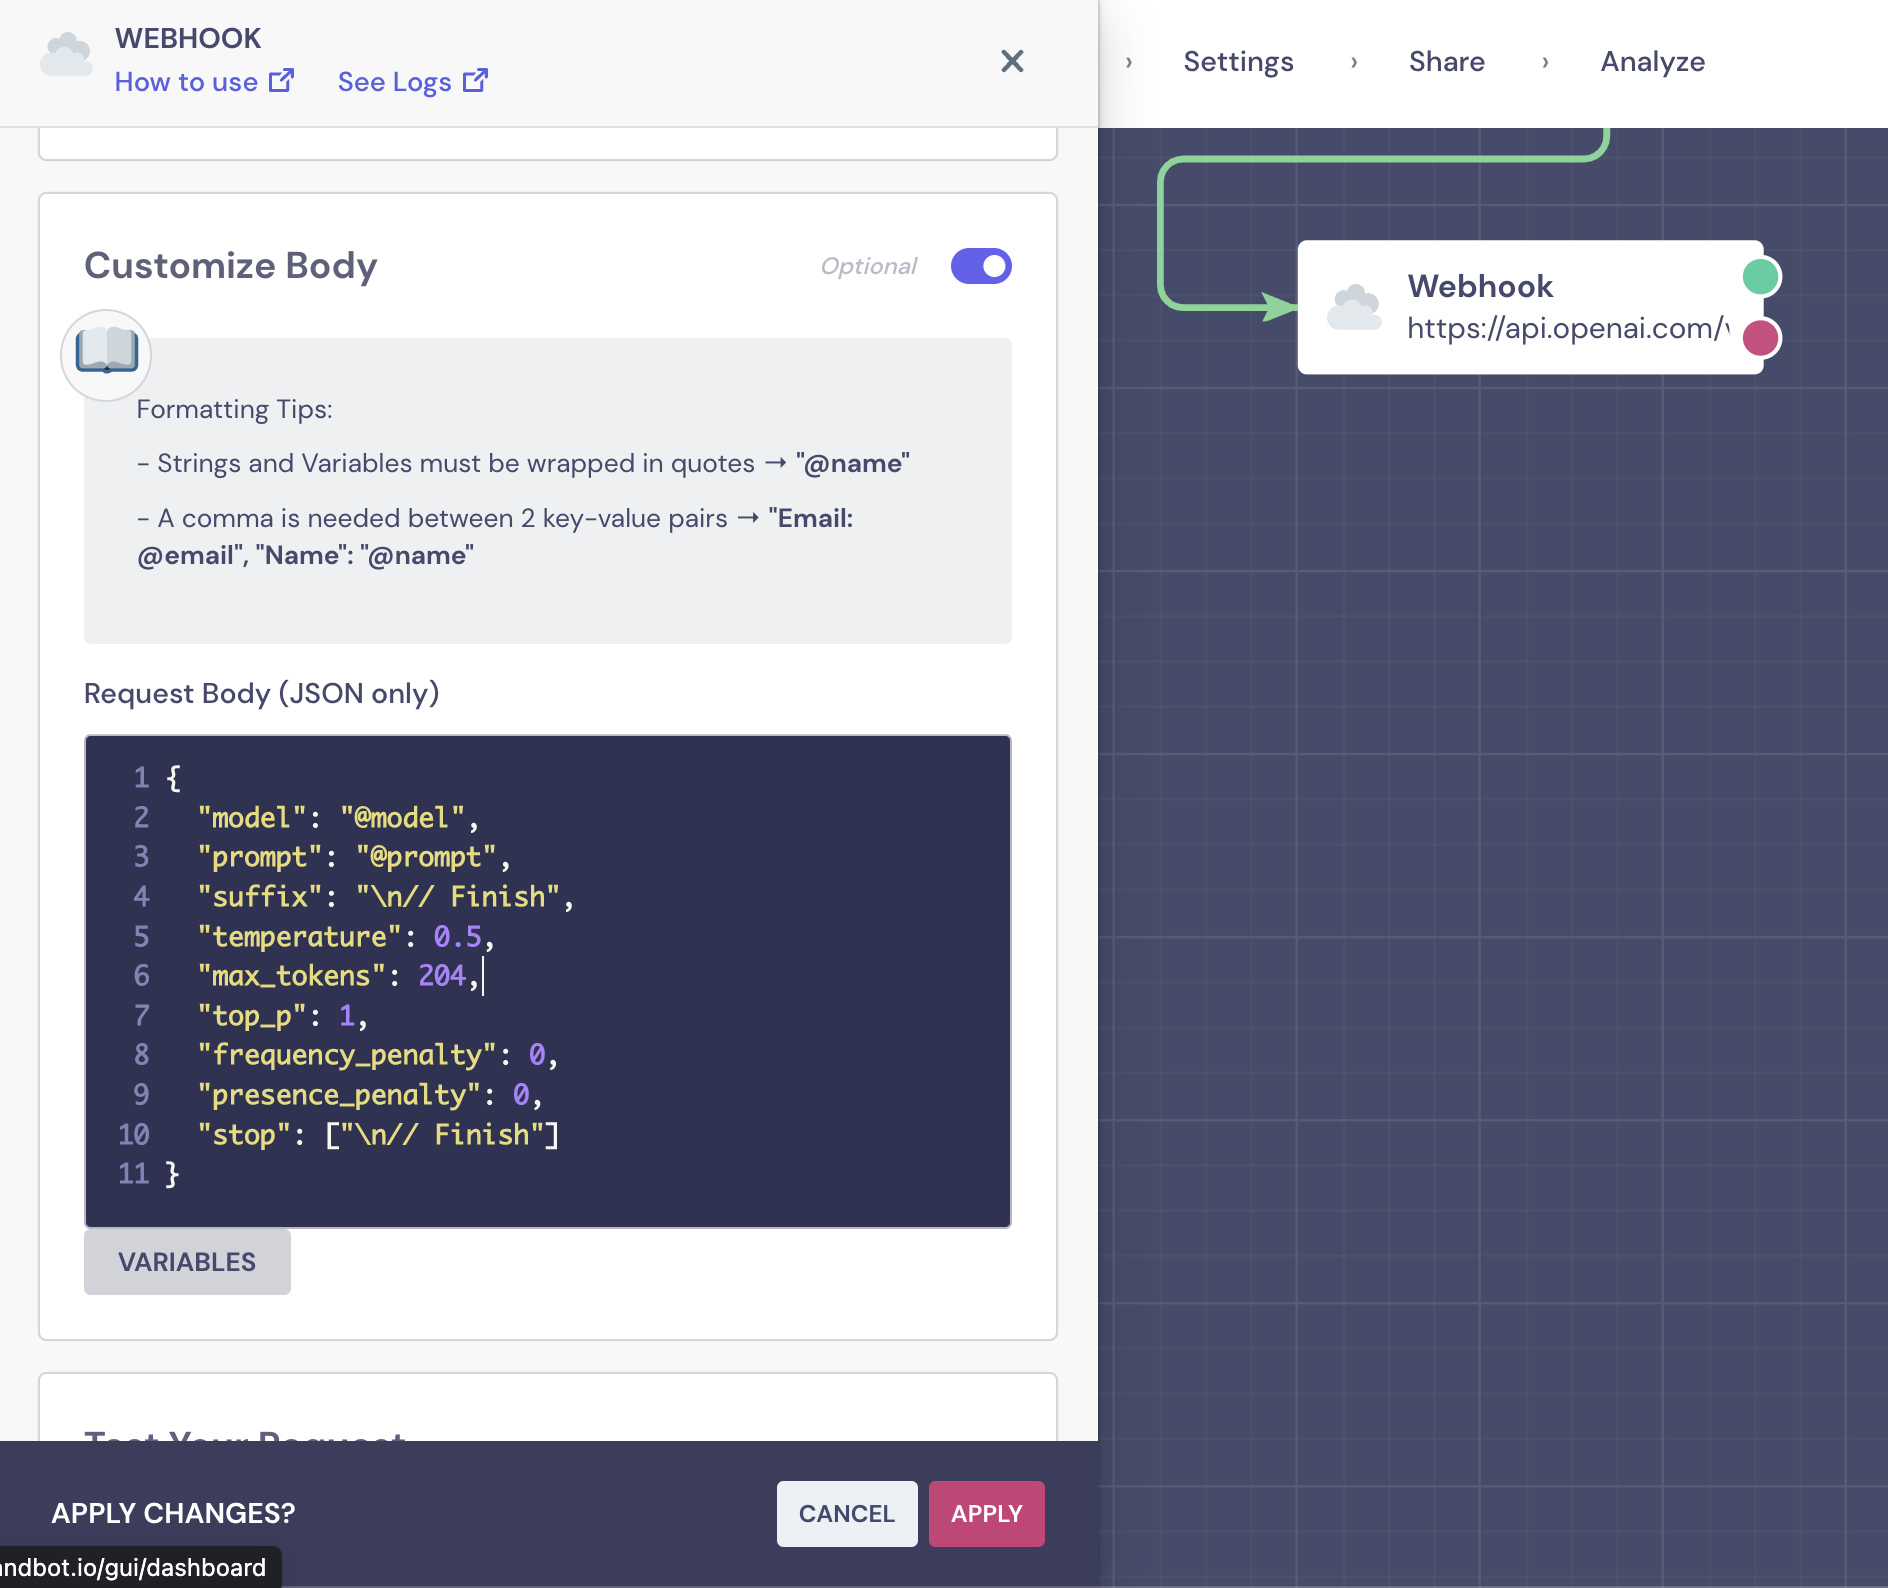
You can customize these advanced options by following OpenAI guides.
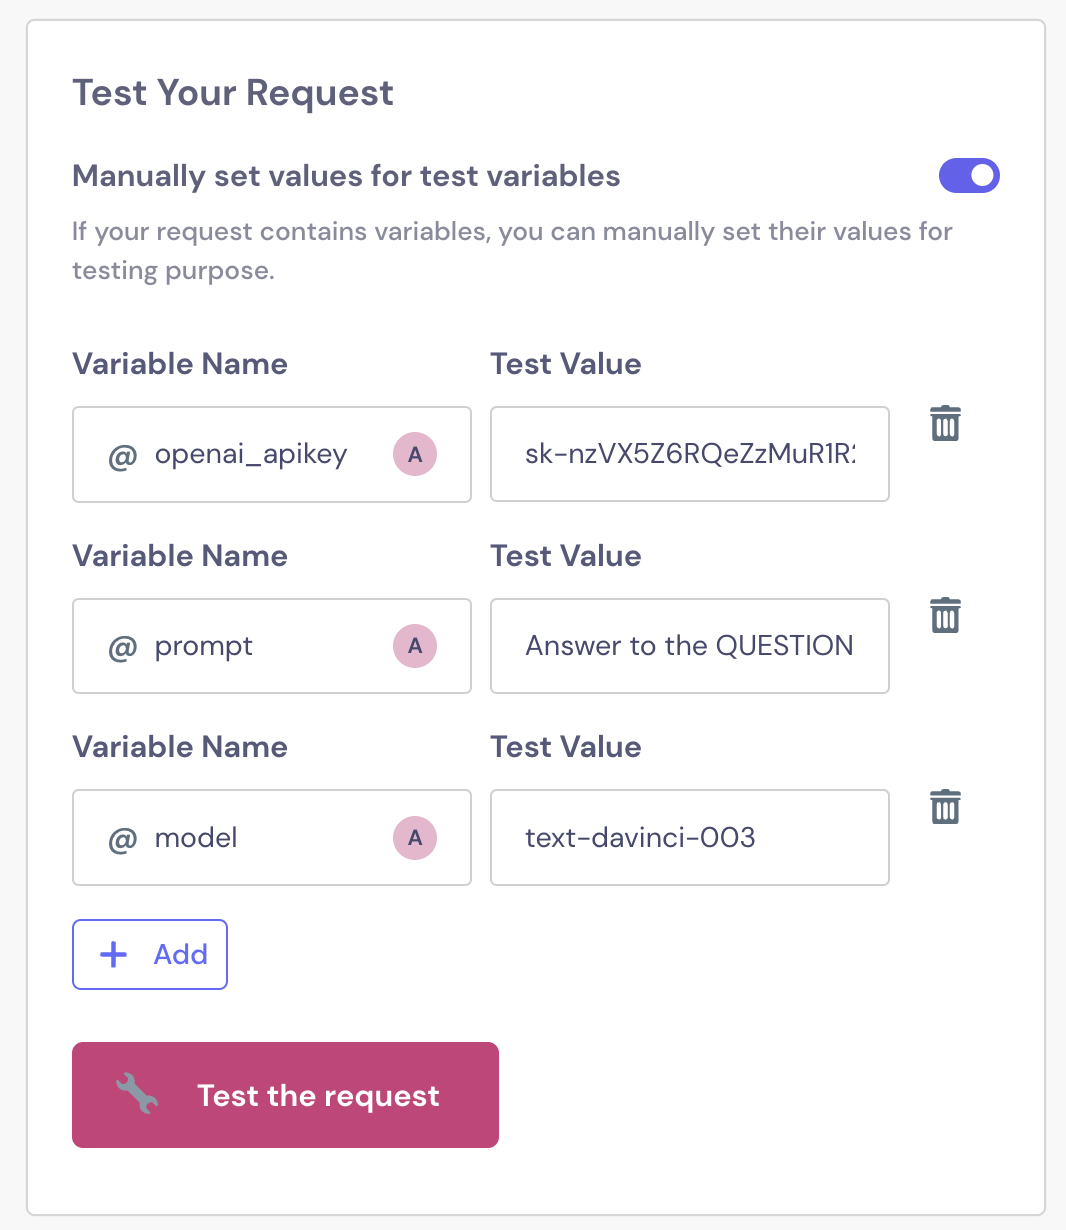
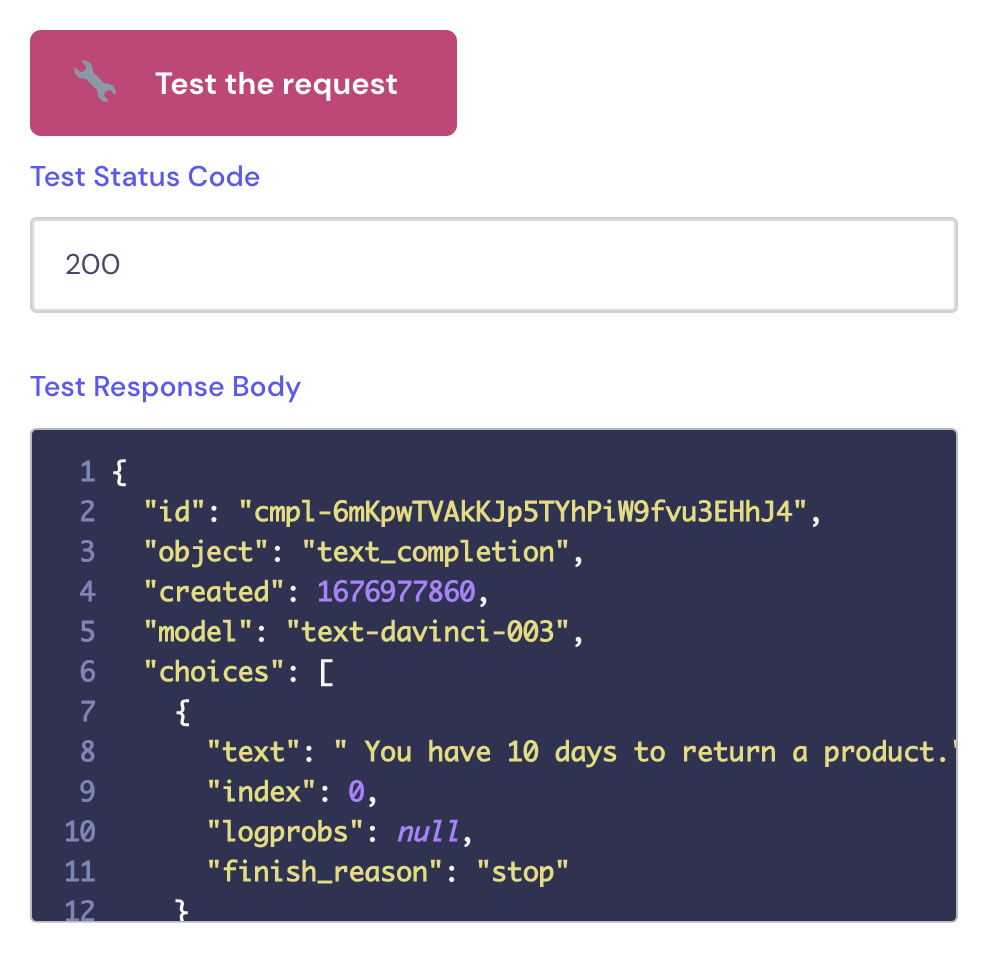
This step is very important: Add the following test data to send a request to OpenAI and create the variable structure inside Landbot with the response from GPT-3. Copy the following test data into the "Test your request" section (replace the API key value with your real one).
VARIABLE NAME
TEST VALUE
openai_apikey
Replace with your API key
prompt
Answer to the QUESTION using DATA as the information source, in a clear sentence.
QUESTION: "How many days do I have to return a product?"
DATA: You have 10 days to return a product.
ANSWER:
model
gpt-3.5-turbo-instruct
Once these variables are configured, click on "Test the request". You should see a response similar to this one if there are no server errors. Remember, OpenAI servers get overloaded sometimes.
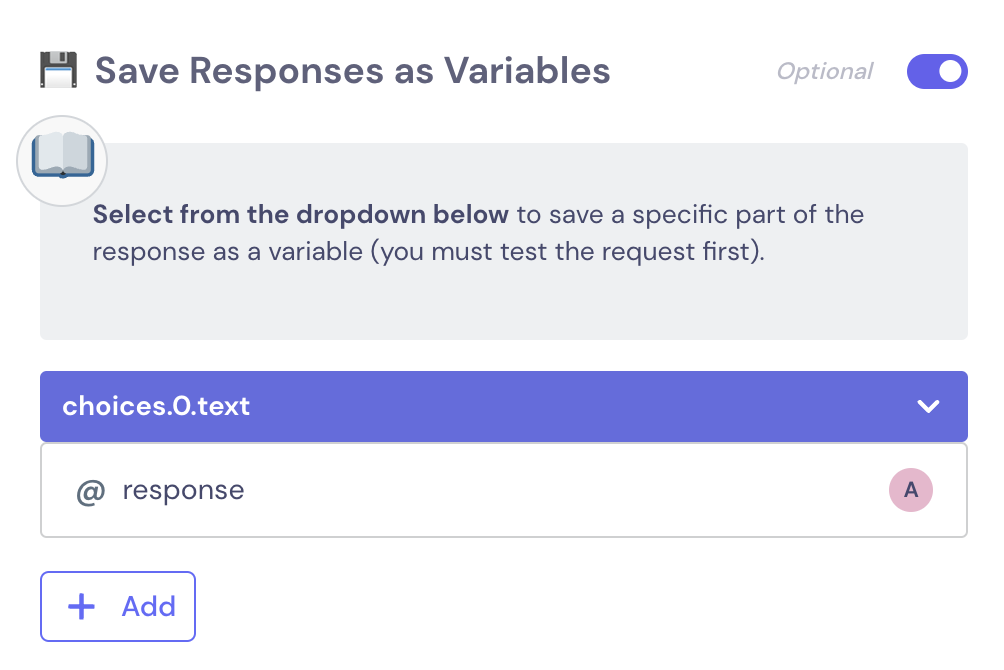
Finally, save the GPT-3 response in a new variable called "response" that you will create.
Click "Save responses as Variables.” Add a new string variable, and call it "response."
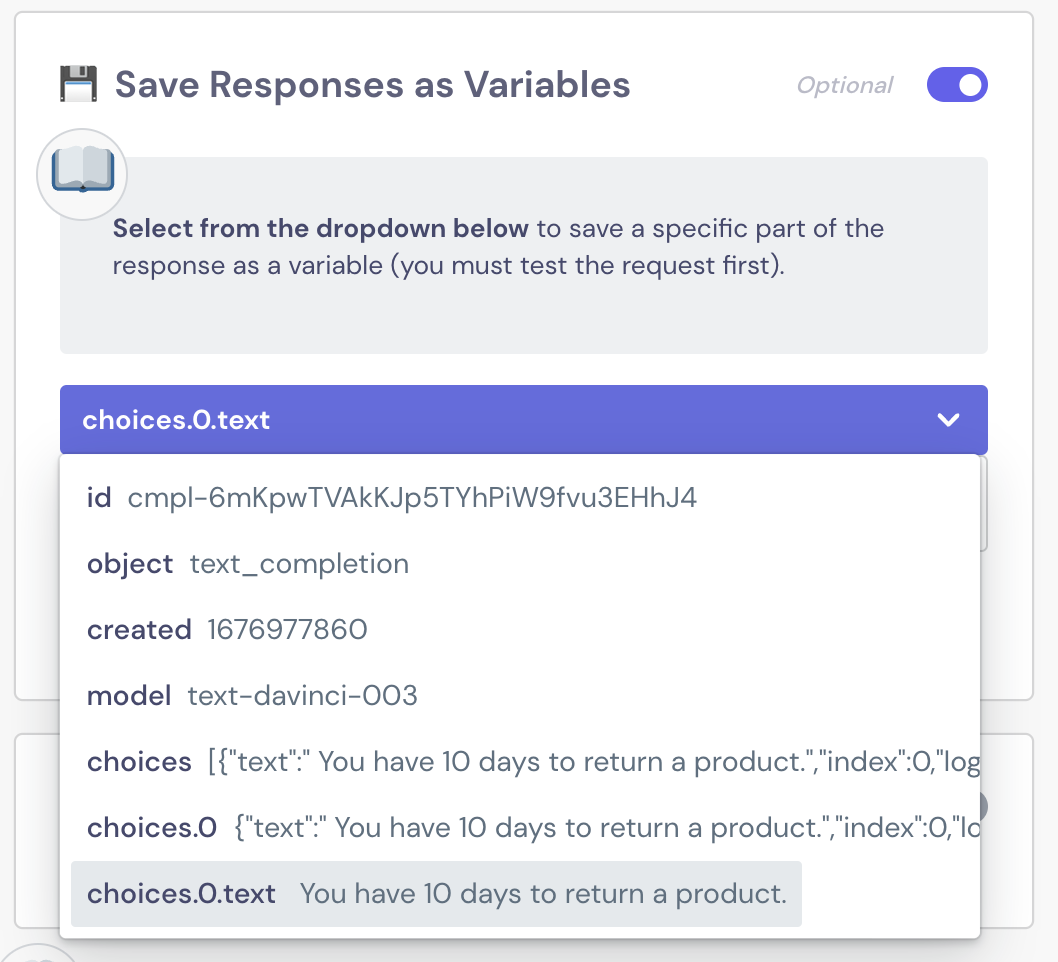
Above the “response” variable, you will see an option called "Entire response body.” Click on it, and you will see a dropdown with several options. Look for where it says "choices.0.text", and select that.
Activate the "Response routing" option.
Finally, save the webhook by clicking on "Apply.”
Your chatbot already understands the user's question and searches the Airtable database for the answer from your Knowledge Base content. Now, you just need to make it display that answer to the user and prepare a scenario for an OpenAI server error (just in case).
Final details: Display the response and error cases
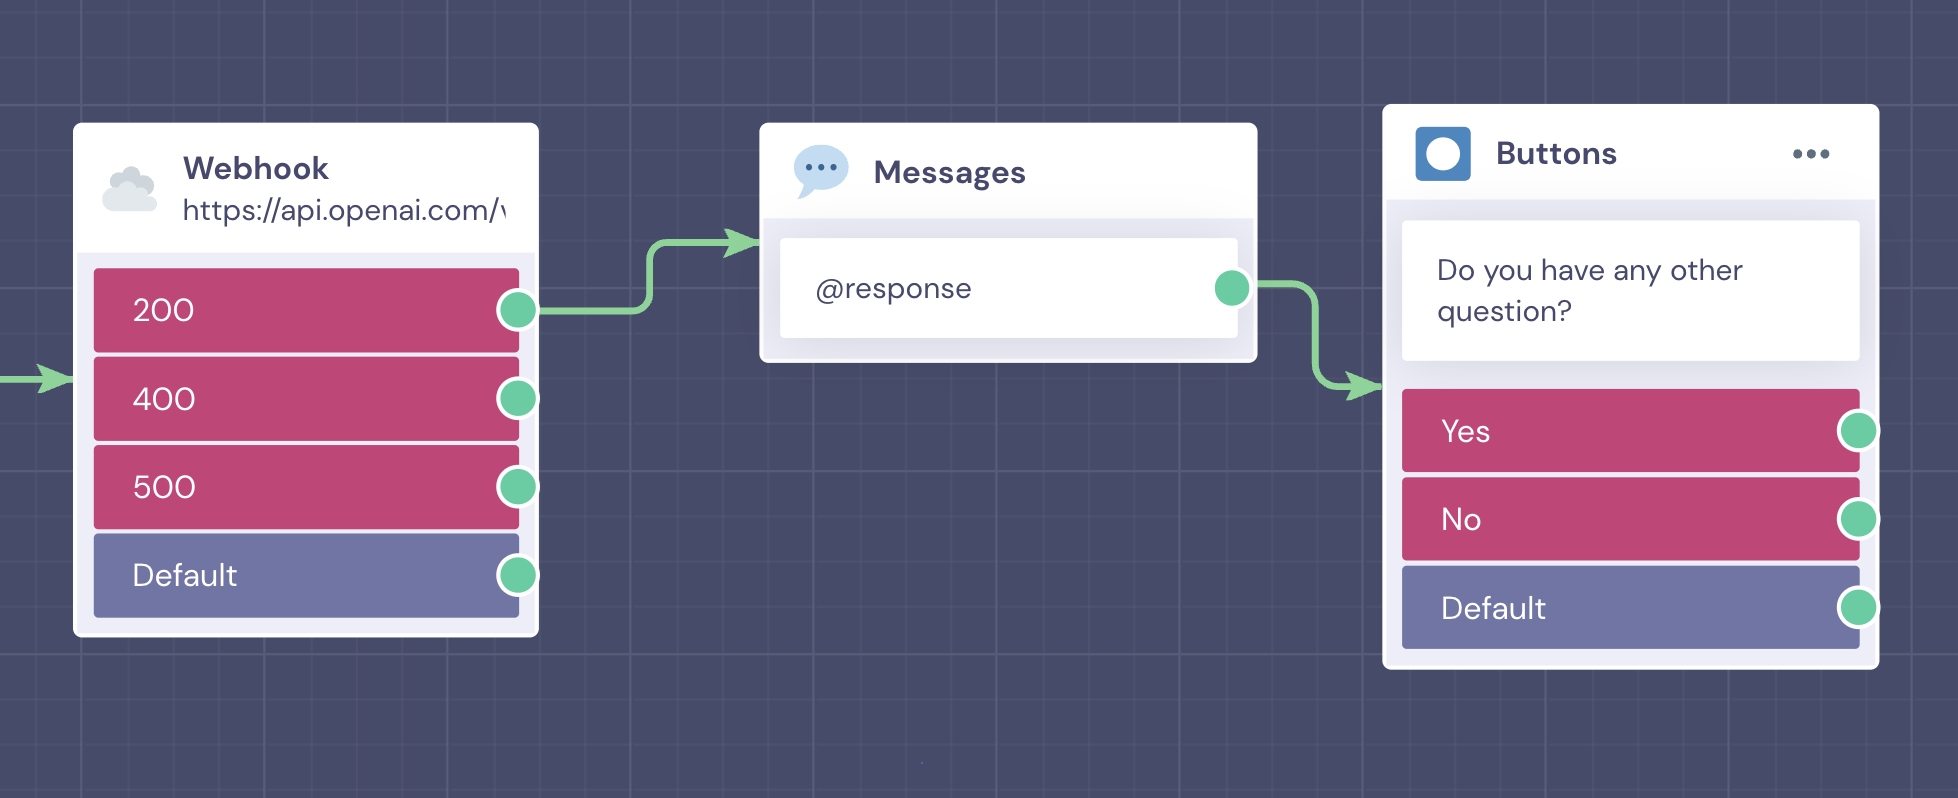
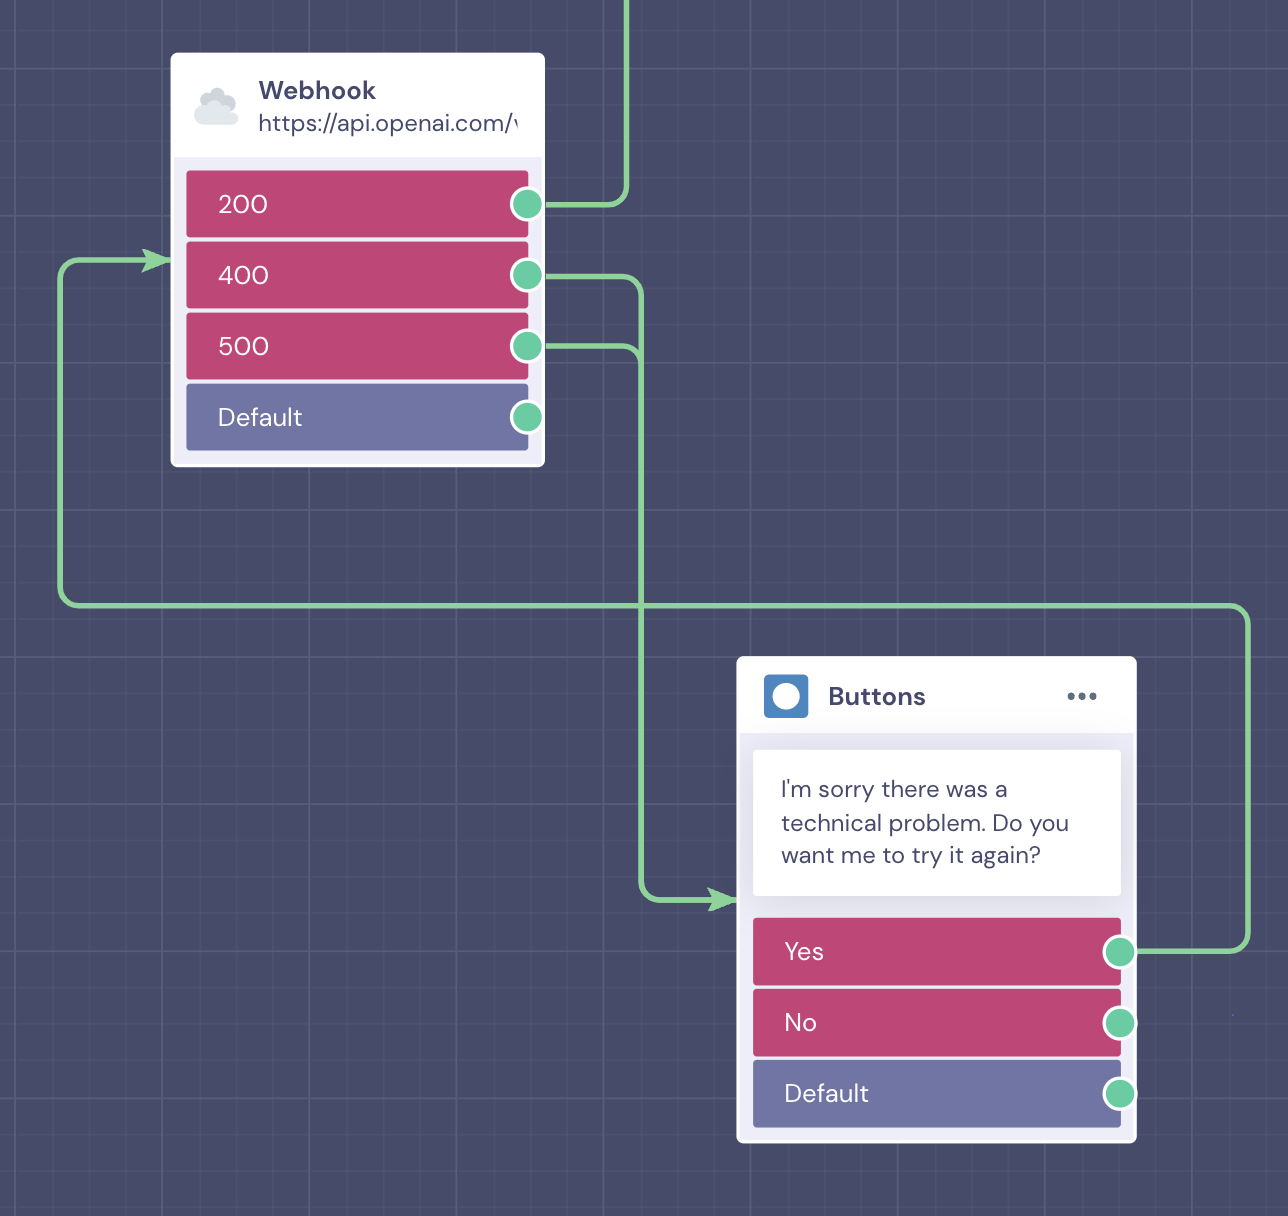
The webhook block should now display three numeric options: 200, 400, and 500. Option 200 is the success code, indicating that you have received a correct response from GPT-3. 400 and 500 are errors, so your need to prepare flows for those cases.
Output 200: Connect it to a new message block and add “@response” as its content. This message content now will be a tailored message by GPT-3.
400 and 500 outputs: Connect a button block to explain the issue and allow the user to choose whether they want to try the request again. You can also be creative and define more advanced flows to create a better error experience—if you want.
And that's it! Now simply test the flow to make sure there are no errors. We hope you enjoyed this tutorial and can start playing with our GPT-3 integration to answer FAQ from your customers!