These modifications can be applied only when you use the Live chat or Pop up Embed
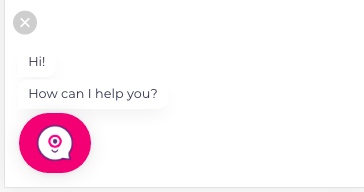
The little chat bubble (aka widget or launcher) displayed in the bottom right corner of your page sometimes needs some changes to better fit the design of your site.
Here are some changes you can make to the launcher bubble to match your website design.
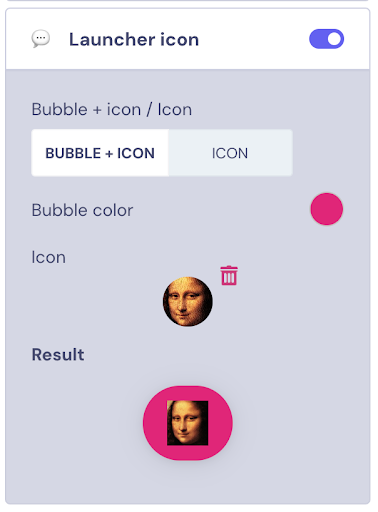
1. Change the image and color in the bubble
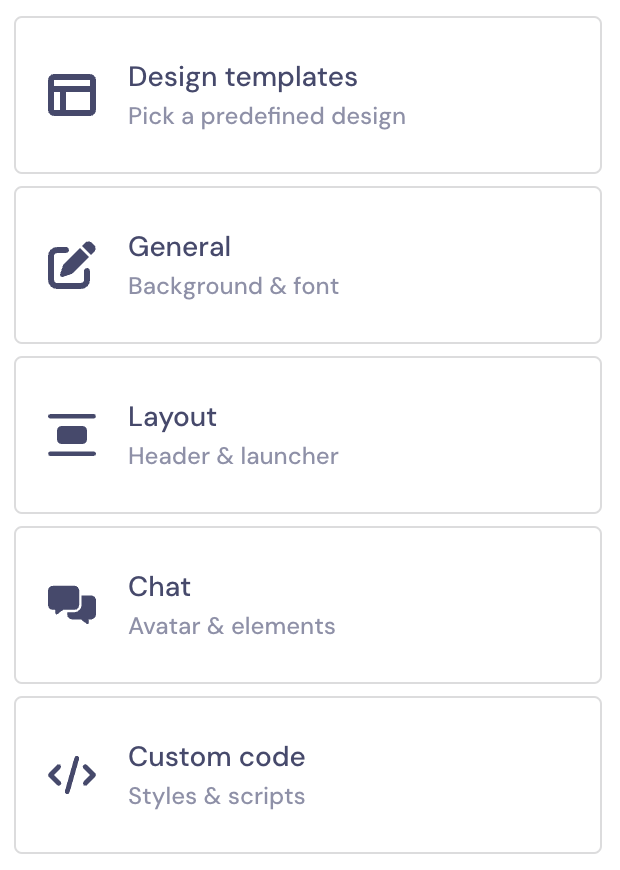
Go to "Design":
Select "Header & launcher":
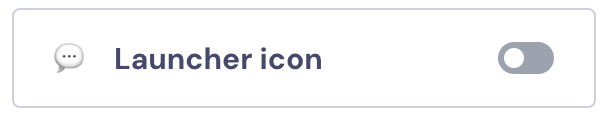
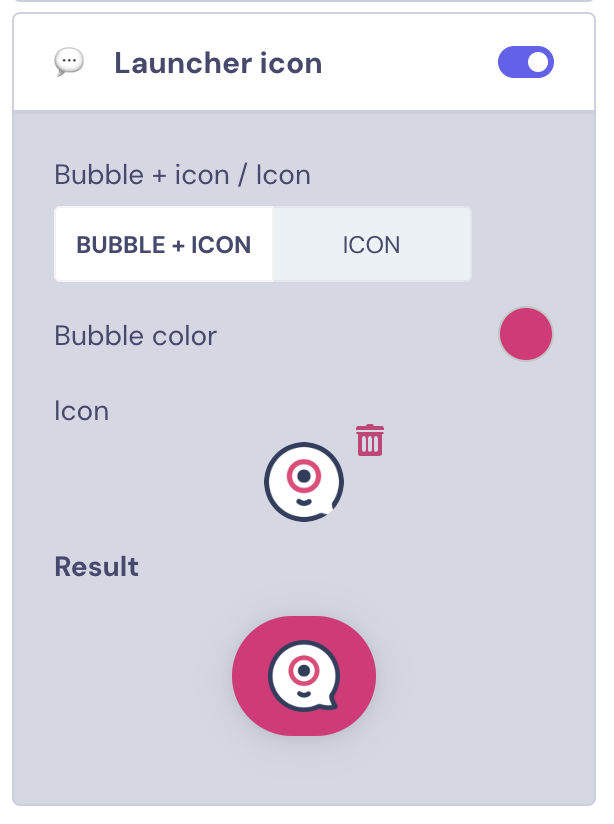
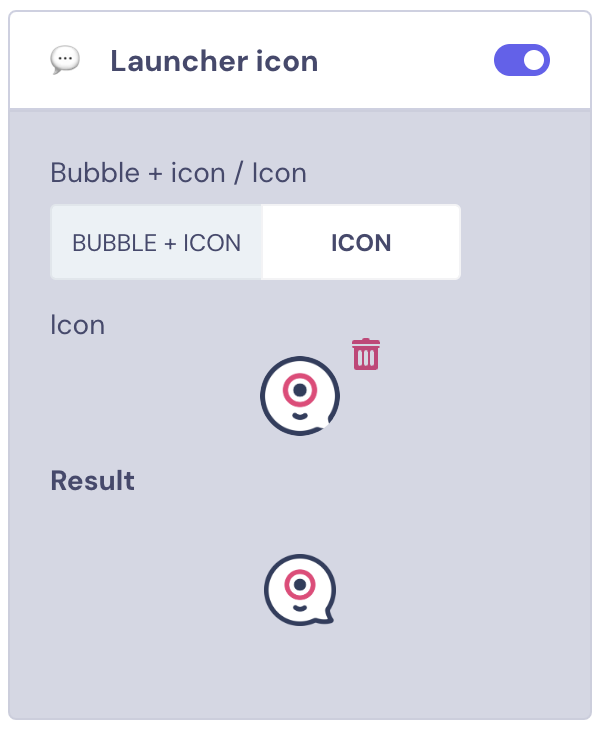
Scroll down and switch on the "Launcher icon" toggle:
Here you will find two options: BUBBLE + ICONICON (only)
Once the type is selected, press the bin icon to delete the current icon:
Now you will be able to upload the icon that you want and test how it looks:
You also can change the color of the bubble:
As soon as the changes are saved, and the bot is saved, you will see the changes in your embedded Landbot as soon as you refresh your page:
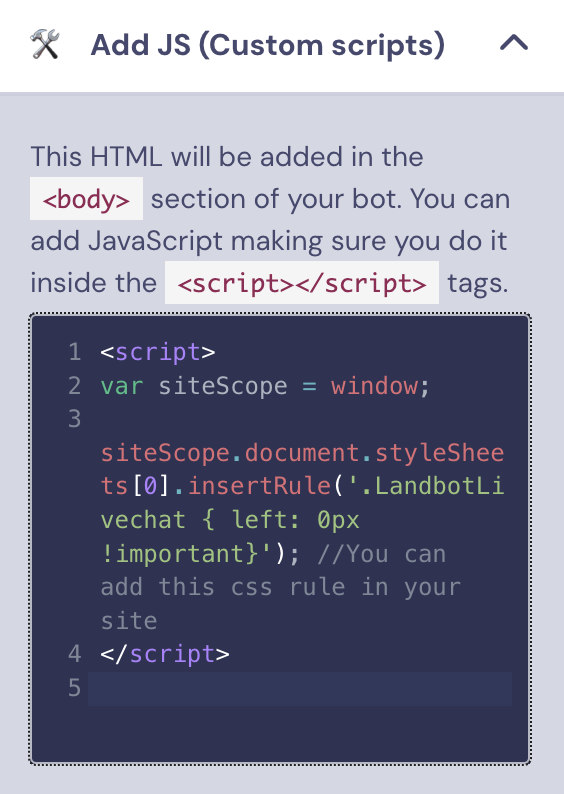
2. Change the position of the Bubbleto the left bottom corner
To move the position of the Bubble to the left bottom corner, add this code to the 'Add JS' section of Landbot, and to your webpage - directly below where the bot is embedded (if you already have a stylesheet you might need to change it to styleSheets[1]):
<script>
var siteScope = window;
  siteScope.document.styleSheets[0].insertRule('.LandbotLivechat { left: 0px !important}'); //You can add this css rule in your site
</script>
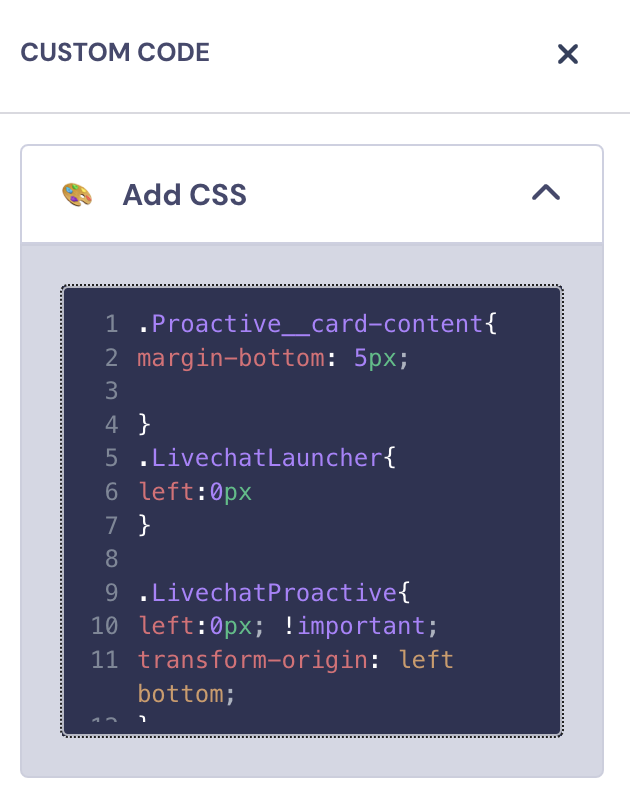
And this other snippet goes in the “Add CSS section” of the bot:
Here is the code:
.Proactive__card-content{ margin-bottom: 5px;
} .LivechatLauncher{ left:0px }
.LivechatProactive{ left:0px; !important; transform-origin: left bottom; }
If you want to change the width and/or height of the chat Bubble, you’ll need to add one of the following snippets in the “Add JS” section of the bot and simply change the px in the code.
If you want to edit just the width of the bubble, use this code:
<script> // Create a new stylesheet and add rules var siteScope = window; var styleSheet = siteScope.document.createElement("style"); siteScope.document.head.appendChild(styleSheet);
this.onLoad(function() { // Create a new stylesheet within the Landbot scope var landbotStyleSheet = landbotScope.document.createElement("style"); landbotScope.document.head.appendChild(landbotStyleSheet);
If you want to change the width and height of the widget, use this code instead:
<script>
// Create a new stylesheet for site-wide styles
var siteScope = window;
var siteStyleSheet = siteScope.document.createElement("style");
siteScope.document.head.appendChild(siteStyleSheet);

// Add rule for LandbotLivechat with width and height
siteStyleSheet.sheet.insertRule('.LandbotLivechat { min-width: 400px !important; min-height: 400px !important; }', 0);

var landbotScope = this;

this.onLoad(function() {
    // Create a new stylesheet within the Landbot scope
    var landbotStyleSheet = landbotScope.document.createElement("style");
    landbotScope.document.head.appendChild(landbotStyleSheet);

    // Add rule for LivechatLauncher with width and height
    landbotStyleSheet.sheet.insertRule('.LivechatLauncher { width: 400px !important; height: 400px !important; }', 0);
});
</script>
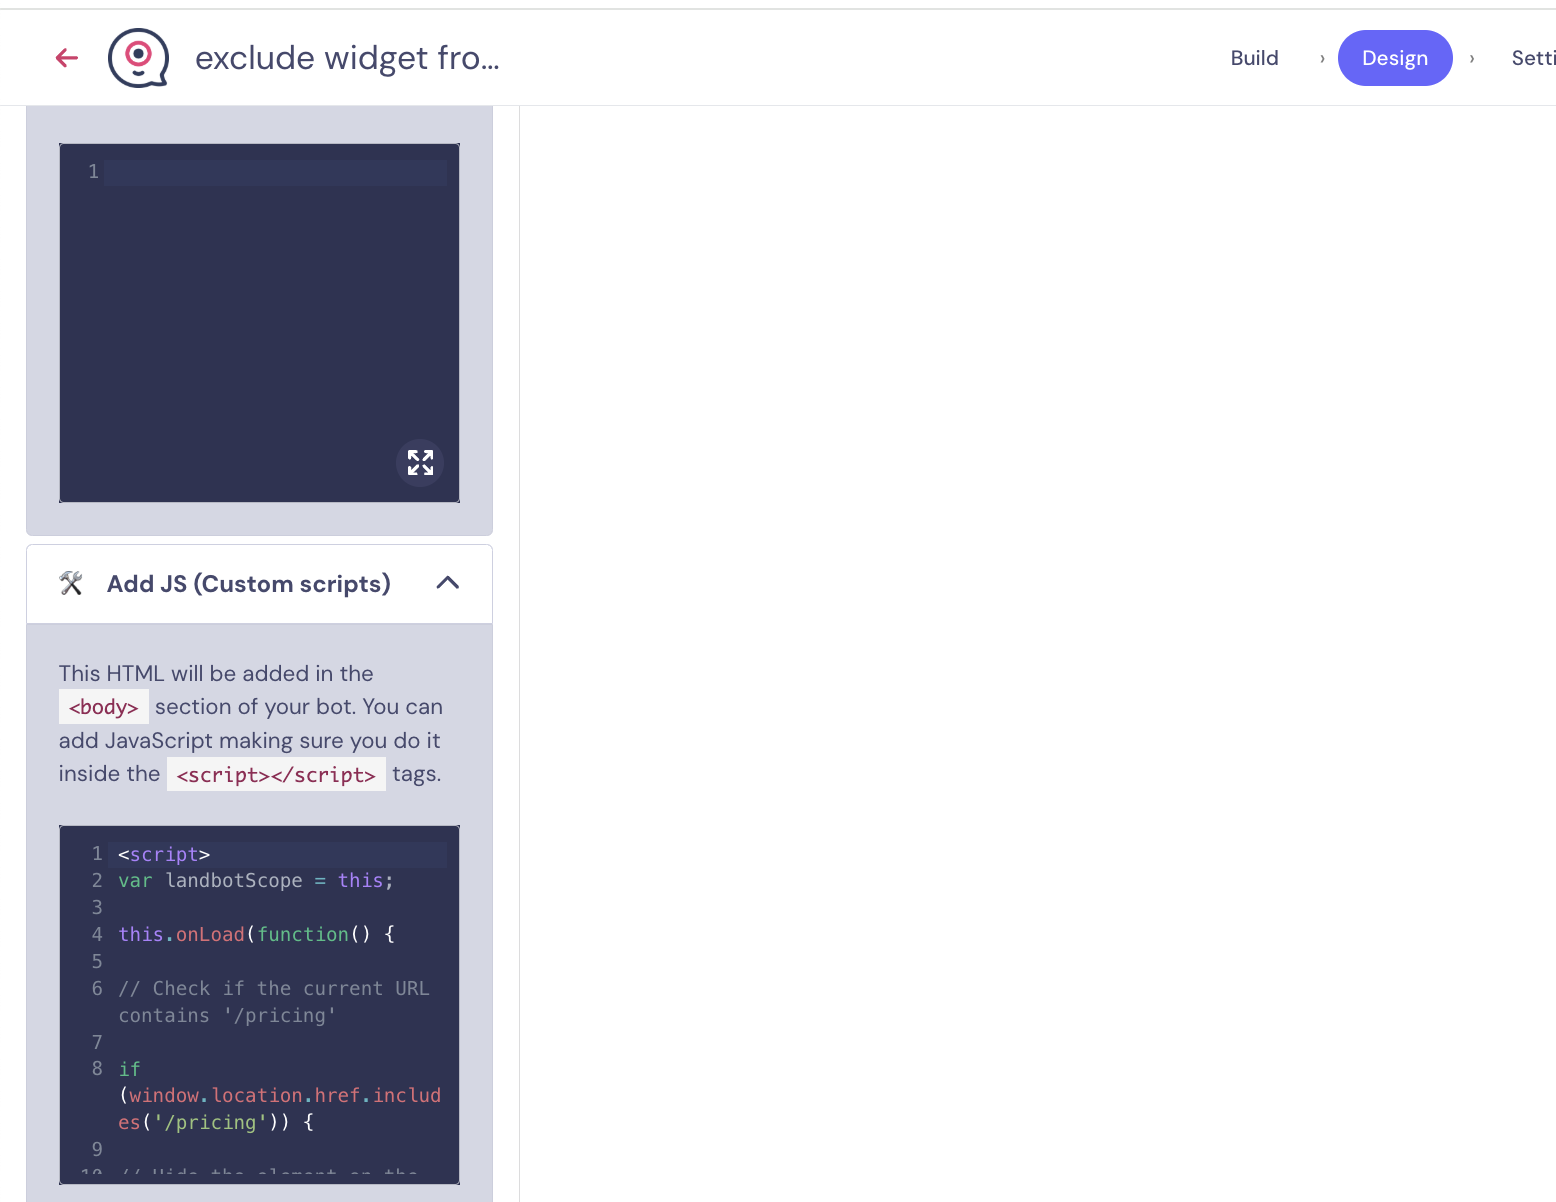
4. Hide the Bubble in Specific Pages
If you want to exclude the chat widget from specific pages in your website, you can add the following script to the Add/JS section of Landbot:
<script>
var landbotScope = this;
this.onLoad(function() {
// Check if the current URL contains '/pricing'
if (window.location.href.includes('/pricing')) {
// Hide the element on the pricing page
landbotScope.document.styleSheets[0].insertRule('.LandbotLivechat { display: none !important }');
}
});
</script>
You will need to substitute '/pricing' in the JS for the subpage where you want to exclude Landbot
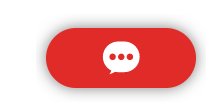
5. Hide the Bubble
If you want the chat widget to be hidden and only open when someone clicks on the chat button, there are two different ways to do it.
The first way is to add the following code in the “Add CSS” section:
.LivechatLauncher { display: none !important}
And then add this style in the page where the bot is embedded if it’s Livechat:
The second way to hide the chat widget is by adding the following code in the “Add JS” section:
<script>
var landbotScope = this;
  this.onLoad(function() { // This Css rule can only applied once Landbot script is loaded
    landbotScope.document.styleSheets[0].insertRule('.LivechatLauncher { display: none !important}'); //You can add this css rule in the Add CSS Section
  })
</script>
6. Hide the Bubble in mobile only
If you want to hide and trigger the chat widget like we did in the previous section, but only for mobile, add this code in the “Add JSS” section:
<script>
var landbotScope = this;
  this.onLoad(function() { // This Css rule can only applied once Landbot script is loaded
    landbotScope.document.styleSheets[0].insertRule('@media only screen and (max-device-width: 767.9px) {.LivechatLauncher{display:none}}'); //You can add this css rule in the Add CSS Section
  })
</script>
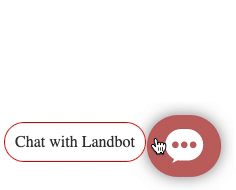
7. Add a Tooltip to theWidget (on hover)
If you want to add a tooltip to the widget when a user hovers the mouse over it, like this:
All you have to do is add the following code in the “Add JS” section:
<script> var siteScope = window; siteScope.document.styleSheets[0].insertRule('.LandbotLivechat { min-width: 300px !important}');
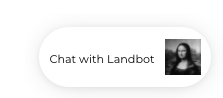
Sometimes, you might want to add a line of text to the chat bubble, so that users know what it’s there for:
To do so, add the following code in the “Add JS” section (if you already have a stylesheet you might need to change it to styleSheets[1]):
<script>
var siteScope = window;
  siteScope.document.styleSheets[0].insertRule('.LandbotLivechat { min-width: 200px !important}'); //You can add this css rule in your site

  var landbotScope = this;
  this.onLoad(function() { // This Css rule can only applied once Landbot script is loaded

    landbotScope.document.styleSheets[0].insertRule(`.LivechatLauncher { width: 200px !important}`); //You can add this css rule in the Add CSS Section
    landbotScope.document.styleSheets[0].insertRule(`.launcher__bubble .is-launcher__avatar img {
  																											display: inline;
}`); //You can add this css rule in the Add CSS Section
    landbotScope.document.styleSheets[0].insertRule(`.launcher__bubble .is-launcher__avatar:before {
  																											content: 'Chat with Landbot';
color: #000;
font-size: 0.7em;
  																											display: inline;
  																											margin-right: 10px;
  																											position: relative;
  																											top: -12px;
}`); //You can add this css rule in the Add CSS Section

  })
</script>
9. Change the size of the Icon (without bubble)
You can change the size of the chat icon to make it bigger or smaller to fit best with the page where you’re embedding the widget. In this example, we show you how to make it bigger.
And this is the after, with the Launcher raised by 14px:
.LivechatLauncher{
   bottom: 14px!important;
}
10. Change the size of the Icon and Bubble
In the previous section, we changed the size of the icon only. If you want to change the size of both the chat icon and bubble, simply add the following code to the “Add CSS” section:
.LivechatLauncher .image {
height: 72px !important;
width: auto !important;
}

.LivechatLauncher {
padding: 0px !important;
}
11. Widget Animations
There are a couple of animations you can add to your chat widget to make it more appealing to your website visitors. You can:
Make the widget larger on hover
To make the widget larger on hover, add the following to the “Add CSS” section of your bot:
.LivechatLauncher:hover { transform: scale(1.2);}
Make the widget bounce on hover
If you want to make the widget bounce on hover, add the following to the “Add CSS” section of your bot:
@keyframes bounce {
0%, 100%, 20%, 50%, 80% {
-webkit-transform: translateY(0);
-ms-transform: translateY(0);
transform: translateY(0)
}
40% {
-webkit-transform: translateY(-30px);
-ms-transform: translateY(-30px);
transform: translateY(-30px)
}
60% {
-webkit-transform: translateY(-15px);
-ms-transform: translateY(-15px);
transform: translateY(-15px)
}
}
.LivechatLauncher {
-webkit-animation-duration: 1s;
animation-duration: 1s;
-webkit-animation-fill-mode: both;
animation-fill-mode: both;
-webkit-animation-timing-function: ease-in-out;
animation-timing-function: ease-in-out;
animation-iteration-count: infinite;
-webkit-animation-iteration-count: infinite;
}
.LivechatLauncher:hover {
cursor: pointer;
animation-name: bounce;
-moz-animation-name: bounce;
}
In conclusion, customizing your chat widget or bubble using these JavaScript and CSS tips is easy, and will make it fit better with your website design and brand image.
 Updated
by Abby
Updated
by Abby