Getting Started with Landbot
Introduction to Landbot 🌍
Creating & Setting Up Your Account 👥
How to create your Landbot account, set it up and invite teammates
Common reasons for not receiving account activation email
Trial period
Account Settings
Build Your First Bot 🛠️
Builder Interface Tour
Getting started - build a bot
Managing Data in Your Chatbot: A Guide to Using Fields
Languages and Translations in Landbot
Organize your flow with Bricks
Using Flow Logic in Landbot
How to Test Your Bot - Complete Guide 🧪
How to "debug" (troubleshoot) your bot's flow to spot possible errors (for non coders)
Starting Point
How to Import a Chatbot Flow Without JSON – Use "Build It For Me" Feature
Launch and Share Your Bot 🚀
Build a bot
Bot's Settings
Bot General Settings
Web bots: Second Visit Settings
Custom System Messages
Hidden Fields (Get params / UTMs from url and use it as variables)
Landbot native SEO & Tracking tools
Typing Emulation (Message Delay)
Messages, Questions and Logic & Technical blocks
Messages
Media Block
Media block
How to display images with a variable URL source
How to embed a .gif file inside a message
Different ways to embed Videos in Landbot
Display video and hide button to continue until video has ended
Send a Message block - Simple Message
Goodbye block
Question blocks
Date Block
Scale Block
Buttons block
Ask for a Name block
Ask for an Email block
Ask a Question block
Ask for a Phone block
Forms block
Multiple-Choice Questions with the Buttons Block
Question: Address block
Question: Autocomplete block
Question: File block
Question: Number block
Question: Picture Choice block
Question: Rating block
Question: URL block
Question: Yes/No block
Logic & Technical blocks
Code Blocks
Dynamic Data
How to Use the Dynamic Data Block in Landbot
Get the array's index of the user selection and extract information from array
Formulas
How to Perform Basic Calculations
Get started with the Formulas block
Formulas Blocks Dashboard
Formulas - Regex
Formulas - Date
Formulas - String
Formulas - Logical
Formulas - Math
Formulas - Object
Formulas - Comparison
Formulas - Array
Persistent Menu
Trigger Automation
Webhook
How to Use the Webhook Block in Landbot: A Beginner's Guide
Webhook Block Dashboard
Webhook Block for Advanced Users
Landbot System Fields: Pre-created fields
Set a Field block
Any of the above Output
Global Keywords 🌍
Keyword Jump
Lead Scoring block
Jump To block
AB Test
Conditions block
Conditions block II (with Dates, Usage and Agents variables)
Close Chat block
How to ask a question based on a variable not being set (empty URL params)
Business Hours block
Custom Goals
Note block
Share & Embed
Redirect Users
How to open a new URL in another tab (window)
How to redirect visitors to a URL (web only)
How to add a Click-to-Call/Email/WhatsApp button
Redirect User Based on Language Input (DeepL)
Generate a URL that has variables from user answers
Popup on Exit Intent
Share
Customized Embed Actions
How to redirect user to another url in your site with Livechat open to continue conversation
How to Detect Visitors Browser
Customize and embed your WhatsApp Widget
Modifying Embed Size
Detect if bot was opened
Customized Behavior in Mobile Browsers
Load script and display bot on click button
Launch Bot On Exit Intent
Display Bot During Business Hours Only (Livechat & Popup)
Open / Close a Web bot (embedded)
Launching a bot depending on browser language
How to pass WordPress logged in user data to Landbot
Set the flow depending on the url path (for embedded landbots)
How to launch a Landbot by clicking a button
Open LiveChat bot as soon as page loads
Detect if a visitor is on Mobile/Tablet or Desktop
Embed
Embed your bot into your website and use a custom domain
Embed Landbot in an iframe
Landbot in Wix
Landbot in your web with Google Tag Manager
Landbot in Webflow
Embed in Sharetribe
Landbot in Shopify
Embedding Landbot in Carrd
Landbot in Wordpress
Landbot in Squarespace
Customizing the Proactive Message
Design section (web bots)
Verification & Security
Validate phone number with SMS verification (with Vonage Verify)
Cookie consent banner (full page / full page embed)
Add Captcha Verification (Non-Embedded Bots)
Bricks
How to disable a bot
Account Settings and Billing
Billing
Privacy and Security
Teammates
Agent Status and Log out
Roles & Permissions for Teammates
Manage Landbot Teammates - Add and Customize Agents
Startup Discounts
NGOs and Educational Organizations Discount
AI in Landbot
Landbot AI Agent
AI Agent - Interactive components
AI Agent Block
AI Agent Setup - Best Practices
Tips to migrate from old AI Assistants to AI Agents
How to create custom Instructions for your Landbot AI Agent with AI (ChatGPT, Claude...)
AI Agent In Action - Live Implementation Example
Capture, generate and use data with AI Agents
Structuring your AI Agent Knowledge Base
Custom AI Integrations
Create a JSON format response from OpenAI in WhatsApp
Responses API
Connect OpenAI Assistant with Landbot
AI in WhatsApp
How to build a FAQ chatbot with GPT-3
GPT-4 in Landbot
OpenAI
Prompt Engineering for GPT-3
Build a Customer Service Bot with ChatGPT and Extract Information
Google Gemini in Landbot
Build a Chatbot with DeepSeek
AI Task block Overview
Integrations with Landbot
Native Integrations
Airtable
Airtable integration block
Get data filtered from Airtable with a Brick- Shop example
20 different ways to GET and filter data from Airtable
How to add/update different field types in Airtable (POST, PATCH & PUT)
How to Create, Update, Retrieve and Delete records in Airtable (POST, PATCH, GET & DELETE)
Get more than 100 items from Airtable
Insert Multiple Records to Airtable with a Loop
How to Get an Airtable Token
Advanced filters formulas Airtable block
Airtable usecase: Create an event registration bot with limited availability
Update Multiple Records in Airtable Using a Loop
Reservation bot with Airtable
Calendly
Dialogflow
Dialogflow & Landbot course
Dialogflow & Landbot intro: What is NLP, Dialogflow and what can you do with it?
Dialogflow & Landbot lesson 1: Create your first agent and intent in Dialogflow
Dialogflow & Landbot lesson 2: Get the JSON Key
Dialogflow & Landbot lesson 3: Setting up of Dialogflow in Landbot
Dialogflow & Landbot lesson 4: Training phrases and responses for a FAQ
Dialogflow & Landbot lesson 5: Entities and Landbot variables
Dialogflow & Landbot lesson 6: Redirect user depending on Dialogflow response parameters (intent, entities and more)
Learn more about Dialogflow - Courses and communities
Integrations > Dialogflow Block
How to extract parameters from Dialogflow response with Formulas
Dialogflow Integration Dashboard
Dialogflow in Unsupported Languages (& Multilingual)
Dialogflow - How to get JSON Key
Google Sheets
Google Sheets Integration: Insert, Update and Retrieve data
How to use Google Sheets to create a simple verification system for returning visitors
How to Upload Document & store link
How to give unique Coupon Codes (with Google Spreadsheets)
Google Sheets Integration Dashboard
How to insert a new row with data and formulas in Google Sheets
How to use Google Spreadsheet as a Content Management System for your bot
Hubspot
MailChimp
Salesforce
Segment
SendGrid
Send an Email
Sendgrid Integration Dashboard
How to create a custom SendGrid email - (Custom "from" email)
Slack
Stripe
Zapier
How to Configure the Landbot and Zapier Integration Using the Zapier Block
Zapier Integration Dashboard
How to insert a row to Google Spreadsheet by Zapier
How to generate a document with PDFMonkey by Zapier
Send WhatsApp Templates from Zapier
How to Send Emails from Your Landbot Using Gmail via Zapier
Get Opt-ins (Contacts) from Facebook Leads using Zapier
How to extract data from an external source with Zapier and use it in Landbot
Zapier trigger
How to complete a digital signature flow by Zapier
Make a survey with Landbot and display the results in a Notion table using Zapier
Custom Integrations
ActiveCampaign
Google Calendar
Google Fonts
Google Maps
Embed Google Maps
Google Maps API Key for Address block
Extract Data With Google Maps Geocoding API
Calculate Distances With Google Maps API
Google Meet
IFTTT
Integrately
Intercom
Make
Connecting MySQL with Make.com (formerly Integromat)
Send WhatsApp Message Template from Make
Make Integration With Trigger Automation Block
How to send an email through Sendinblue by Make.com (formerly Integromat)
Get Opt-ins (Contacts) from Facebook Leads using Make
How to extract data from an external source with Make.com and use it in Landbot
OCR
Pabbly
Paragon
Pipedream
PDF Monkey
Store Locator Widgets
Xano
Zendesk
Send an Email with Brevo
How to integrate Landbot with n8n
How to Integrate Landbot with n8n using Webhooks
WhatsApp Channel
Getting started!
WhatsApp Testing
Build a WhatsApp Bot - Best Practices and User guide
Build a WhatsApp Bot - Best Practices for Developers
Types of Content and Media you can use in WhatsApp 🖼
1. WhatsApp Article Directory
WhatsApp Integration & Pricing FAQ
Adding & Managing your WhatsApp Channel
Meta Business Verification - Best Practices 🇬🇧
WhatsApp Number Deletion (WA Channel management)
Adding a WhatsApp number to your account
WhatsApp’s Messaging Policy: New Accepted Industry verticals
Meta processes guide: Meta Business Verification, Official Business Account (OBA) requests, Appeals
Additional Number integration: Limitations and Requirements (Number integration)
Existing WhatsApp Number Migration
Key Insights for Migrating to WhatsApp Business API Cloud
How to's, Compatibility & Workarounds
WhatsApp bots - Feature Compatibility Guide
WhatsApp - How to direct a user through a different bot flow on their second visit
WhatsApp - Get user out of error message loop
How to do Meta ads conversion tracking in WhatsApp bot using the Conversion API
Getting Subscribers: Opt-in, Contacts
How to get Opt-ins (Contacts) for your WhatsApp 🚀
WhatsApp Quality - Best Practices
Opt-In block for WhatsApp 🚀
Opt-in Check Block
Contact Subscribe Block: Manage Opt-ins and Audiences
New Contacts: Import, Segment, and Organize Easily
WhatsApp Channel Settings
Parent Bot/Linked Bot - Add a main bot to your WhatsApp number
WhatsApp Channel Panel (Settings)
Growth Tools for WhatsApp
Messaging and contacting your users
WhatsApp Campaigns 💌
WhatsApp's Message Templates
Audience block
WhatsApp Marketing Playbook: Best Practices for Leadgen
WhatsApp Error Logs: Troubleshooting guide
Audiences
WhatsApp for Devs
How to calculate the number of days between two selected dates (WhatsApp)
Creating a Loop in WhatsApp
Recognise the users input when sending a Message Template with buttons
Trigger Event if User Abandons Chat
Calculate Distances in WhatsApp
Send Automated Message Templates based on Dates
How to Let Users Opt-Out of Your WhatsApp Messages via API
reply from Slack: How to create an integration to allow agents reply WhatsApp users from Slack (with Node JS)
Set Up a Delay Timer in Bot
Notify Teammates of Chat via WhatsApp
Native blocks for WhatsApp
Reply Buttons block (WhatsApp)
Keyword Options 🔑 Assign keywords to buttons (WhatsApp and Facebook)
List Buttons Block (WhatsApp)
Collect Intent block
Send a WhatsApp Message Template from the Builder
WhatsApp Changes to Message Limits starting October 7, 2025
Other Channels - Messenger and APIChat
Facebook Messenger
The Facebook Messenger Ultimate Guide
Types of content you can use in Messenger bots 🖼
How to Preview a Messenger bot
API Chat (for Developers)
Human Takeover & Inbox
Metrics and Data Management
Metrics Section
How to export the data from your bots
Export data: How to open a CSV file
Bot's Analyze Section
For Developers & Designers
JavaScript and CSS
CSS and Design Customizations
Design Customizations
Advanced (Custom CSS & Custom JS)
Components CSS Library Index
Background Class CSS
Identify Blocks CSS
Buttons Class CSS
Header Class CSS
Media Class CSS
Message Bubble Class CSS
Miscellaneous Classes CSS
CSS Customization Examples: "Back to School" Theme
Get started guide for CSS Design in Landbot
CSS Customization Examples: Call To Action: WhatsApp
CSS Examples: Lead Gen
CSS Customization Examples: "Translucid"
CSS Customization Examples: "Minimalist" Theme
Dynamic Data CSS
Form Block CSS
CSS for Typewriter Effect
CSS Customization Examples: Carrd Embed Beginner
Dynamically Change a Bot's Background
Proactive Message Customizations with Javascript and CSS
Landbot v3 - Web CSS - RTL
CSS Customization Examples: Video Bubble
Dynamically Change Any Style
CSS Customization Examples: CV Template
Change Landbot custom CSS dynamically from parent page onload
Widget/Bubble Customizations with Javascript and CSS
JavaScript
How to change Avatar dynamically
Javascript in WhatsApp
Landbot JavaScript Integration
Different ways to format numbers with JS
How to display an HTML Table and a List in Landbot v3 web
Trigger a Global Keyword with JS (web v3)
Create Dynamic Shopping Cart with JS and CSS
Add a Chart (with Chart JS library) in your Landbot
Different ways to format numbers with JS (WhatsApp)
Pop up modal to embed third party elements
Landbot API
Send WhatsApp Messages with Landbot API
How to "send" a user to a specific point in the flow with Javascript and with the API
APIs
Get Opt-ins (Contacts) using Landbot API
MessageHooks - Landbot Webhooks
Resume flow based on external process with Landbot API (Request, Set, Go)
Tracking
Google Analytics - Track Events (Not embedded)
Google Analytics - Track Events (Embedded)
Meta Pixel - Track Events (only Embedded)
How Track Google Analytics Events in Landbot with Google Tag Manager (GTM)
Google Adwords - How to track Google Adwords in Landbot
Set a timer to get the time spent during the flow
Workarounds and How To's
Workflows
How to build an event registration Landbot (to be used in one screen by many attendees) (web only)
How to let user select a time of booking (with a minimum 45 minutes notice)
Send Files Hosted in Landbot to Your Google Drive with Make
Two-Step Email Verification
Fixing Web Bot Loading Issues for iOS Devices in Meta Campaigns with Disclaimers
Progress Bar Workaround
How to Add User Verification to Your Chatbot
How to set up questions with a countdown
HTML Template for Emails
Creating a Simple Cart in WhatsApp
Creating Masks for User Input (2 examples)
More Topics
Table of Contents
- All Categories
- Account Settings and Billing
- Teammates
- Manage Landbot Teammates - Add and Customize Agents
Manage Landbot Teammates - Add and Customize Agents
 Updated
by Dilyara
Successfully managing Landbot teammates in your account will help enhance collaboration and productivity inside your organization.
By assigning specific roles and permissions within your Landbot account, you can streamline workflows and empower team members to contribute to your builds. This approach optimizes task delegation and fosters a cohesive environment where each member understands their responsibilities.
Let’s look at what Landbot teammates can do and how to manage them.
What is a Teammate?
A Teammate is a user who has access to your Landbot account but with their own credentials.
When you create a Teammate, you create a unique login and password for this user. The user then receives an email with the invitation to join your team at the email address you registered.
They will, therefore, be able to log into your account at the same time as you or any other active Teammates.
An invoice will be automatically generated too, which you can check in the Subscription > Invoices section of your account. It will appear as an extra Seat.
The monthly cost of each Teammate will vary depending on your current plan, and you can check the final price when you try to add a Teammate.
Landbot Roles and Permissions
A Teammate can do all sorts of things, but the most important one is to work in collaboration with everyone else, as a team.🤝
The more people involved in the idealization, creation, and maintenance of the bots, the better results you will have!
The different roles and permissions vary according to what you want each teammate to do in the Landbot platform (e.g. Admin.) Please check this article to find more information on how to set Roles and Permissions for your Teammates 🚀
How can I add Teammates?
To add teammates to your Landbot account follow these steps:
- Go to your profile section (Avatar in lower left corner):
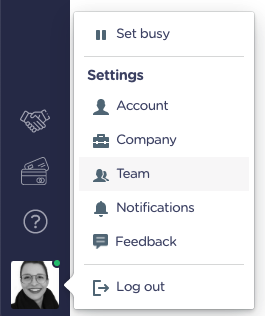
- Select Team

- In the section Teammates you will see a PLUS sign, press on it:

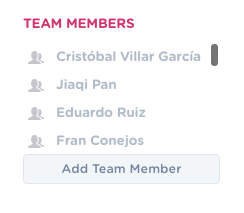
- Now the Add a teammate section will be displayed. Proceed to add the email address of the Teammate that you want to add:
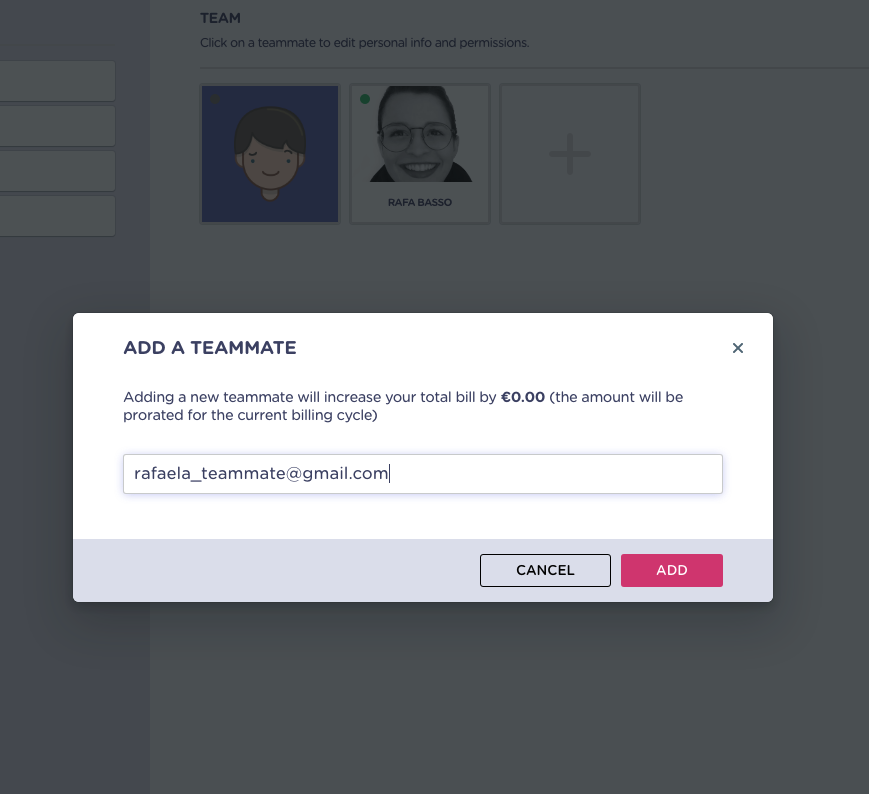 You will see the price you will pay for adding this teammate before confirming the operation. Once you click on ADD, you will be immediately charged.
You can find the invoice for this charge in the Subscription section. - Once you press the button Add, the new user (not that will be the new teammate) will receive an email with the invitation to join the account.
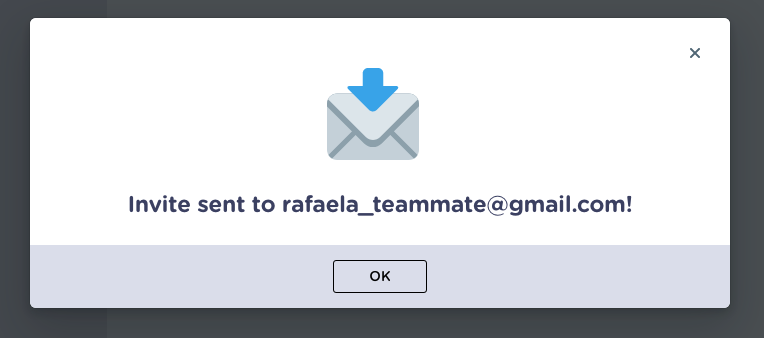
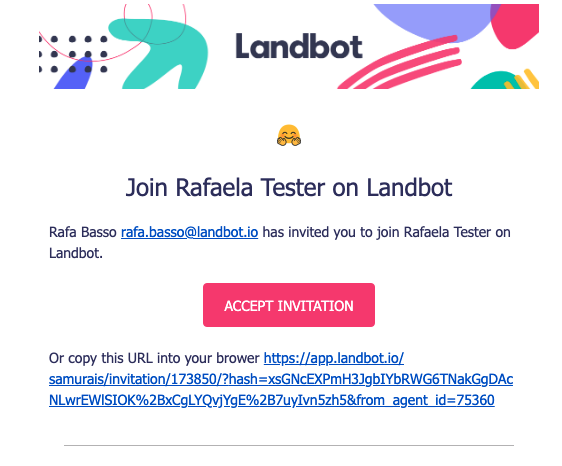
If the user has accessed the login page directly, without clicking on the Accept Invitation button or the invitation URL sent in the invitation email, the system will still require a confirmation that will be sent to the Teammate's email address:

If this is the case, the user must then click on the button or link from the email, and then log in (check the following step), to activate the account.
- The new Teammate can then log into the platform, by adding his email address (the very same that received the invitation), and adding a password of his choice.
After doing that, click on Continue to log in:
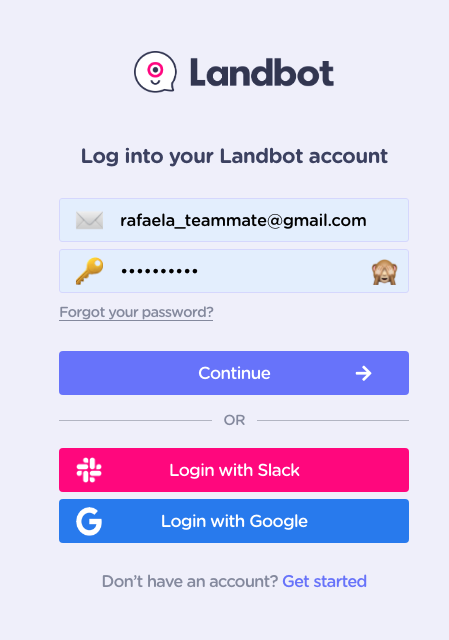
And that is it, the Teammate can already start working on the account with you 💪🏻
PLUS: To edit the Teammate's information, access the Team section, where you can choose the Avatar, change the password, etc.
How many Teammates can I add to an account?
You can add up to 5 Teammates freely, or up to 10 Teammates that have accepted your invitation.
If you need more than 10 Teammates working on your account, please contact us at help@landbot.io , and we can help you with that!
What to do when my Teammate already has a Landbot account?
If the person you are inviting already has a Landbot account, you will see an error message that says "This email is already used by another account".
In this case, there are 3 options:
- Ask the person to change the email on his/her other account, so you can invite him/her with the desired email address.
- Ask the person to delete the other account, if it is not being used.
- Add a "+" followed by any characters before "@" in the email address to create an email alias.
For example: michael.jordan+23@email.com. The person will receive an invitation in his/her inbox michael.jordan@email.com , but should log in using michael.jordan+23@email.com as his log in details.Not all email providers allow this method.
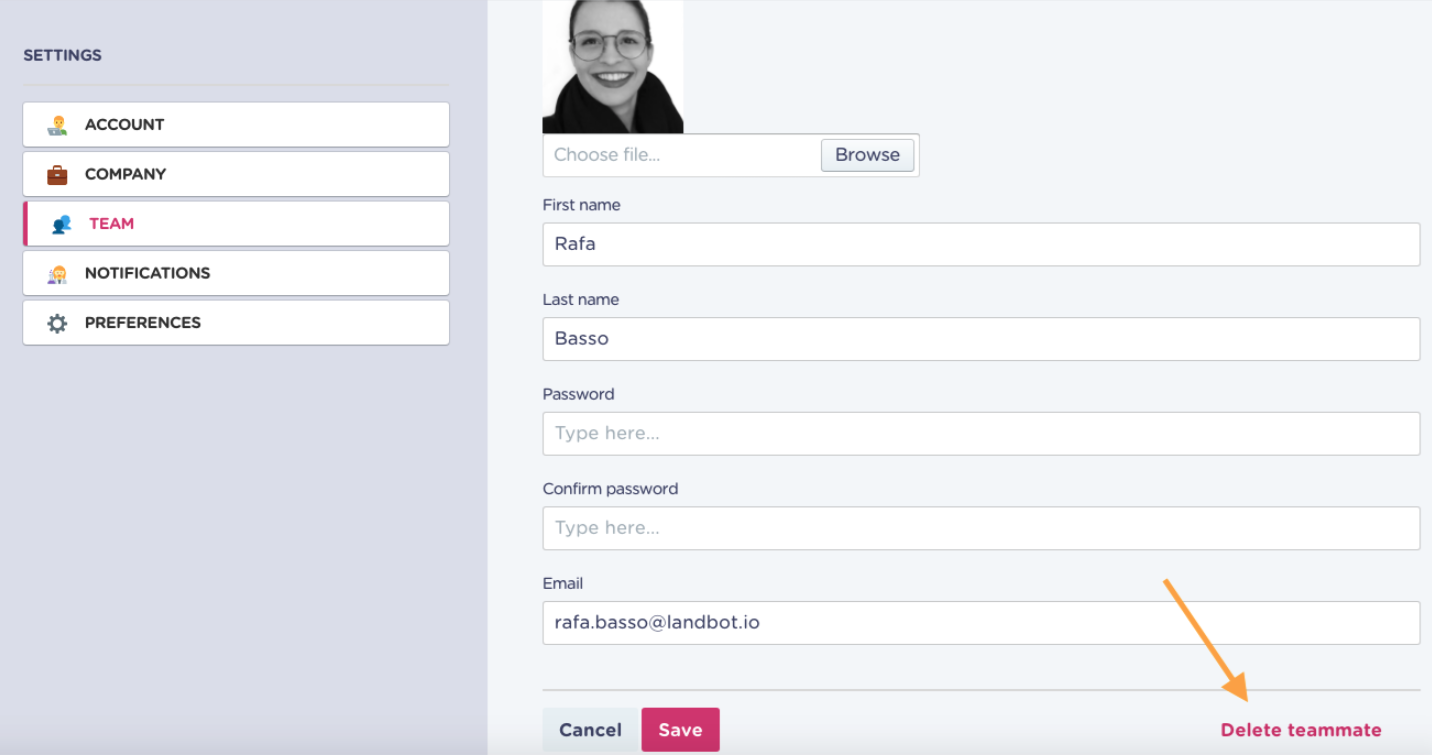
How to delete a Teammate?
To delete a Teammate, choose that Teammate to open its set up options (see here how to get to this section).
You will see a button on the bottom of the page with the option Delete.
Click on DELETE to delete the Teammate from your account.
Take Charge of Your Team Collaboration
Empower your team with the right roles and permissions to maximize efficiency and streamline workflows.
With Landbot teammates, you can enhance collaboration, maintain data security, and ensure everyone contributes effectively. Don’t wait—start optimizing your team’s productivity today!
