Prefer watching than reading? No problem, we've got you covered 👇
What areBricks?
When building your bot, Bricks can come in handy to organize your flow, there you can store the different sections and parts of your bot.
Bricks are very flexible and can be seen as...
📂 Folders: You can add several blocks inside them(or Bricks within Bricks) to organize your bot flow.
🔌 Plugins: Plugins, that you add to your bot for new functionalities without the need to build it from scratch, these are our Bricks Workarounds.
🏃♂️ Shortcuts: Don't repeat again the same blocks, just save them inside a Brick, and add it to your bot whenever you need it!
How to create a Brick from scratch
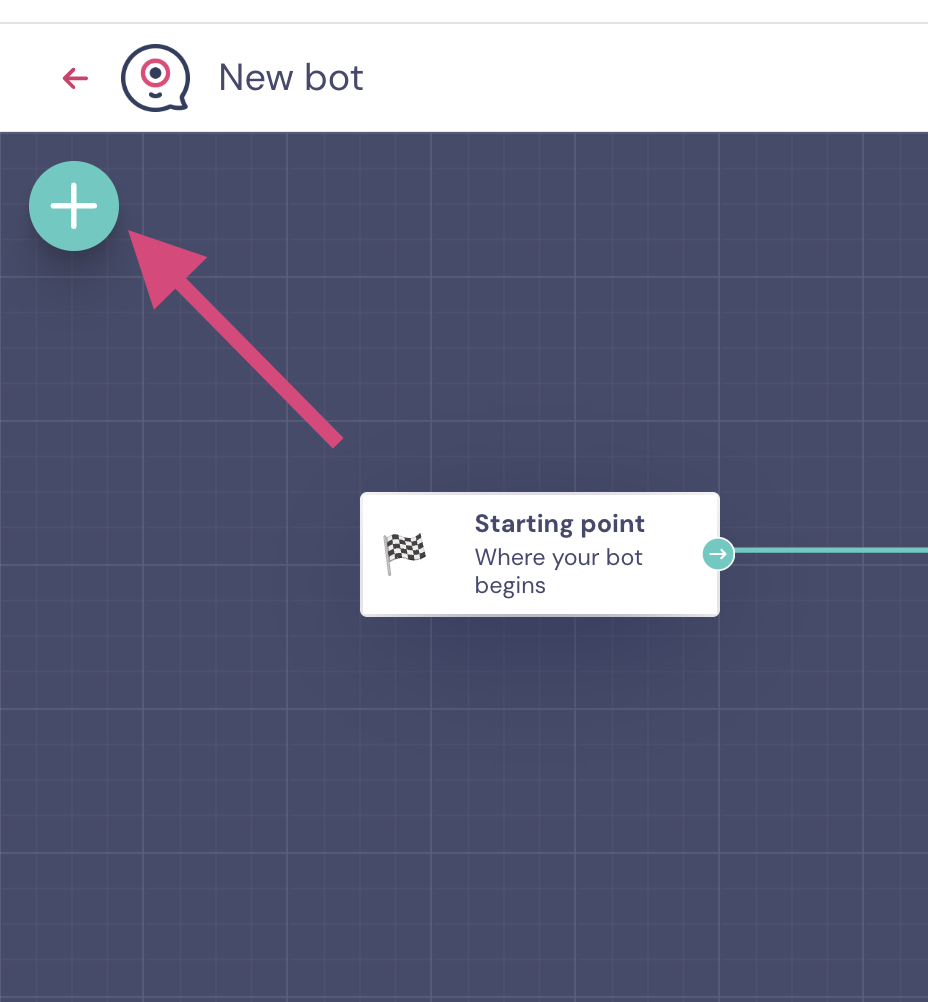
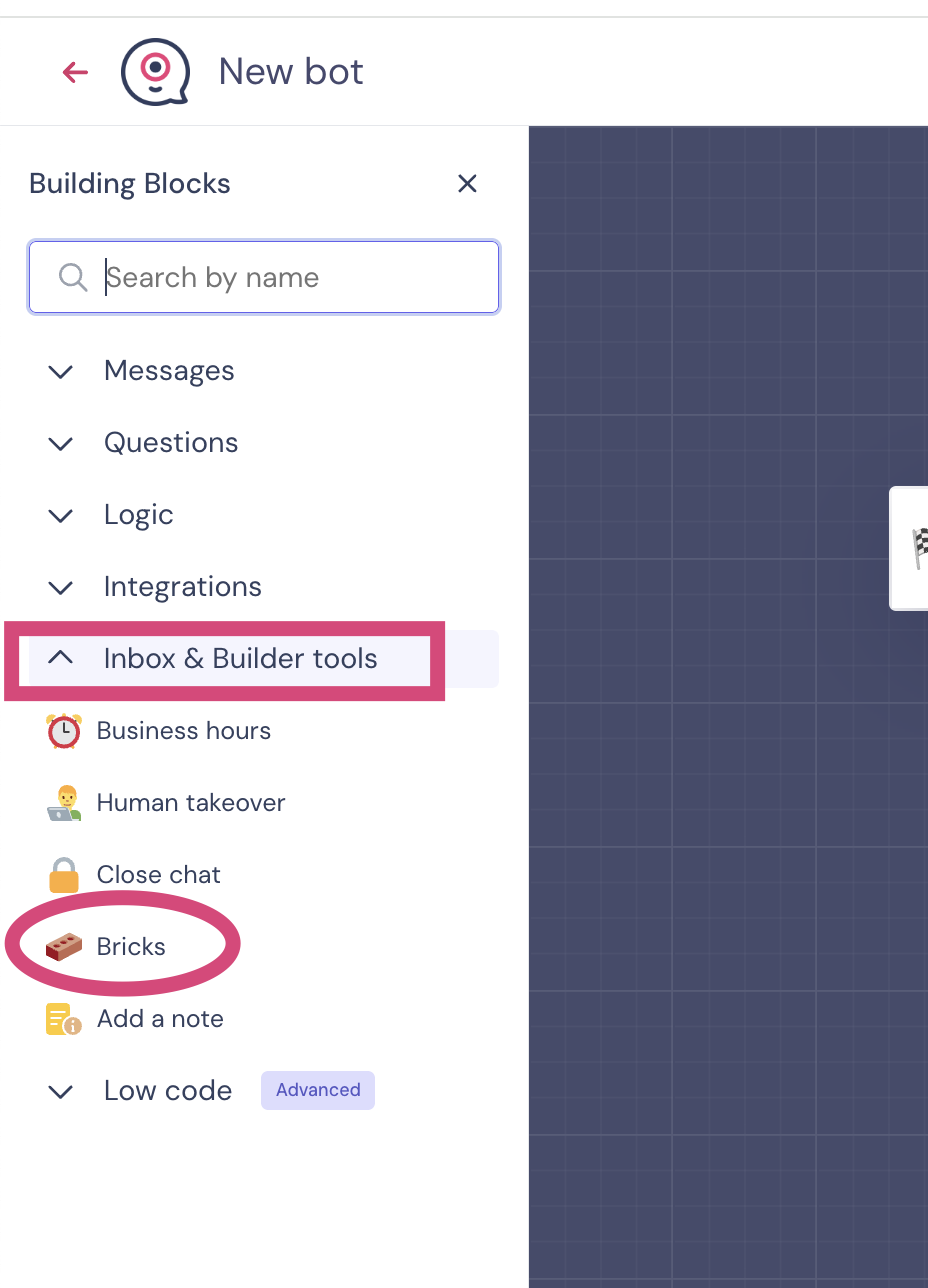
To create a new Brick before adding blocks to it, you have two different options:
Clicking on the plus +icon within the chatbot builder
Click on Inbox & Builder tools > Bricks
Or...
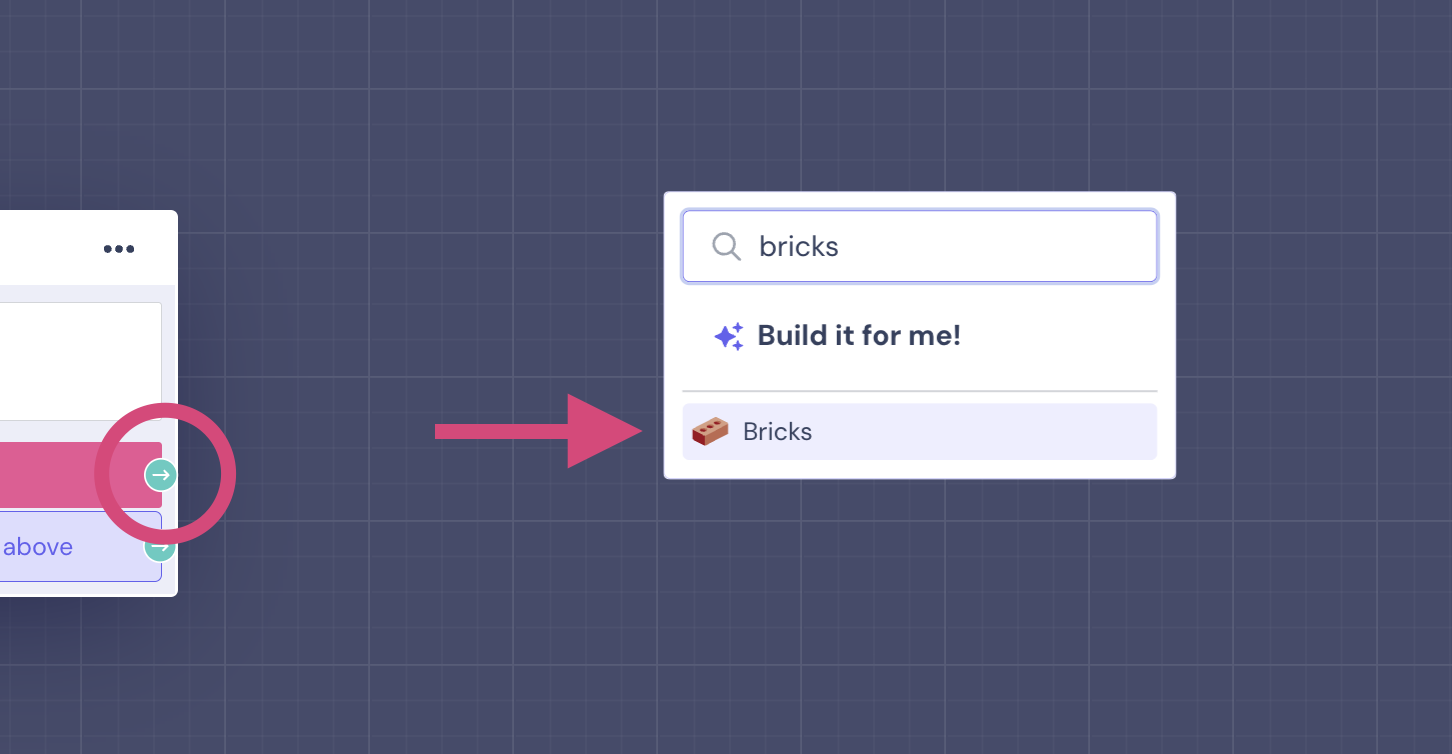
Dragging and dropping the green dot of any block and selecting Brick as the block type
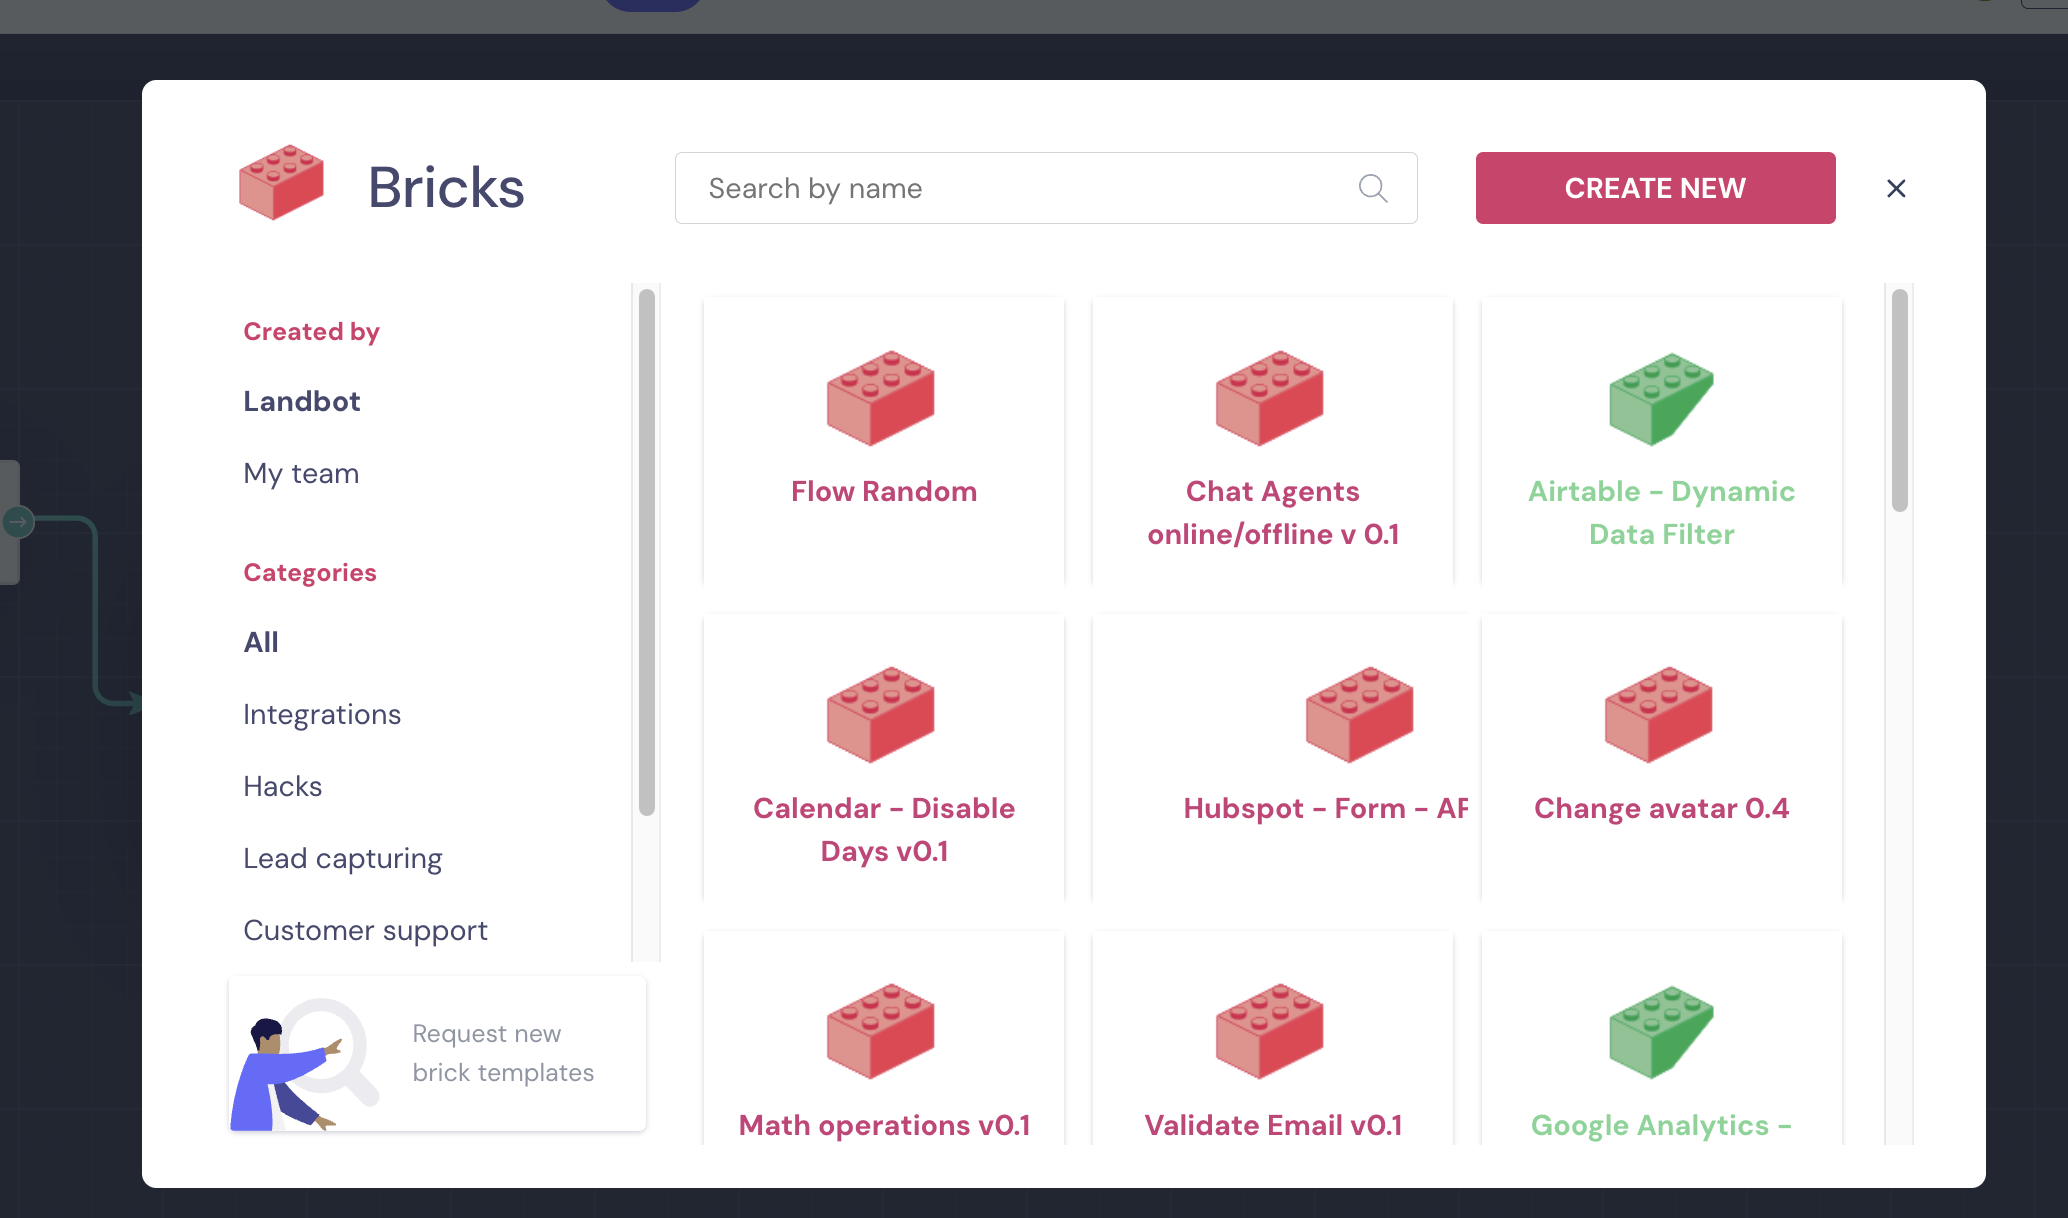
A pop-up will open to select the default Brick templates we have in Landbot or you can select the Brick tempaltes created by your and your teammates by clicking on My team
In this article you can read more about Brick templates and how they work
If you want to create a new brick, just click on the CREATE NEW button
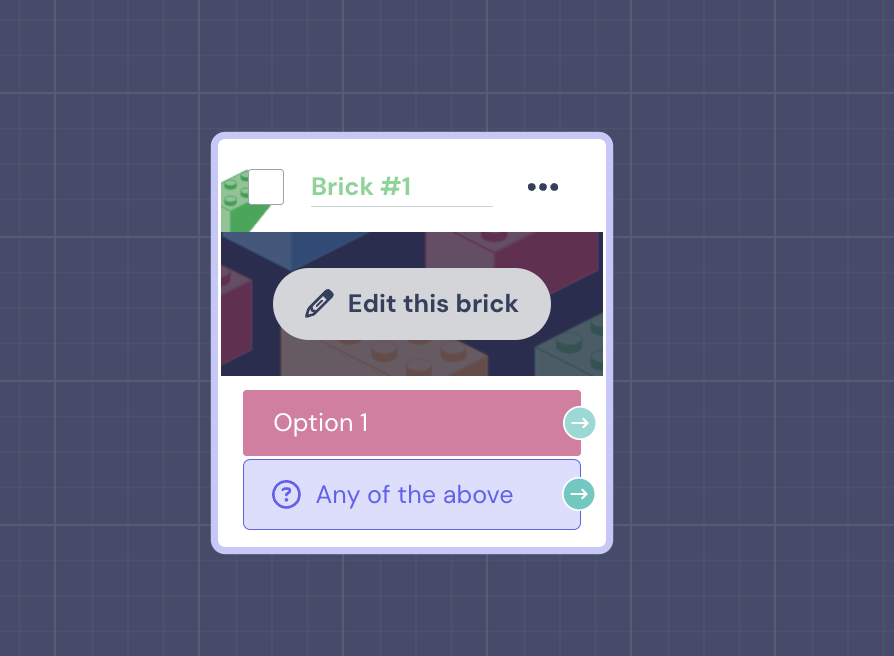
Now, you'll see the new Brick in the canvas. If you hover over it, you will see a button to Edit this brick. Click there to start editing:
Bricks basic setup
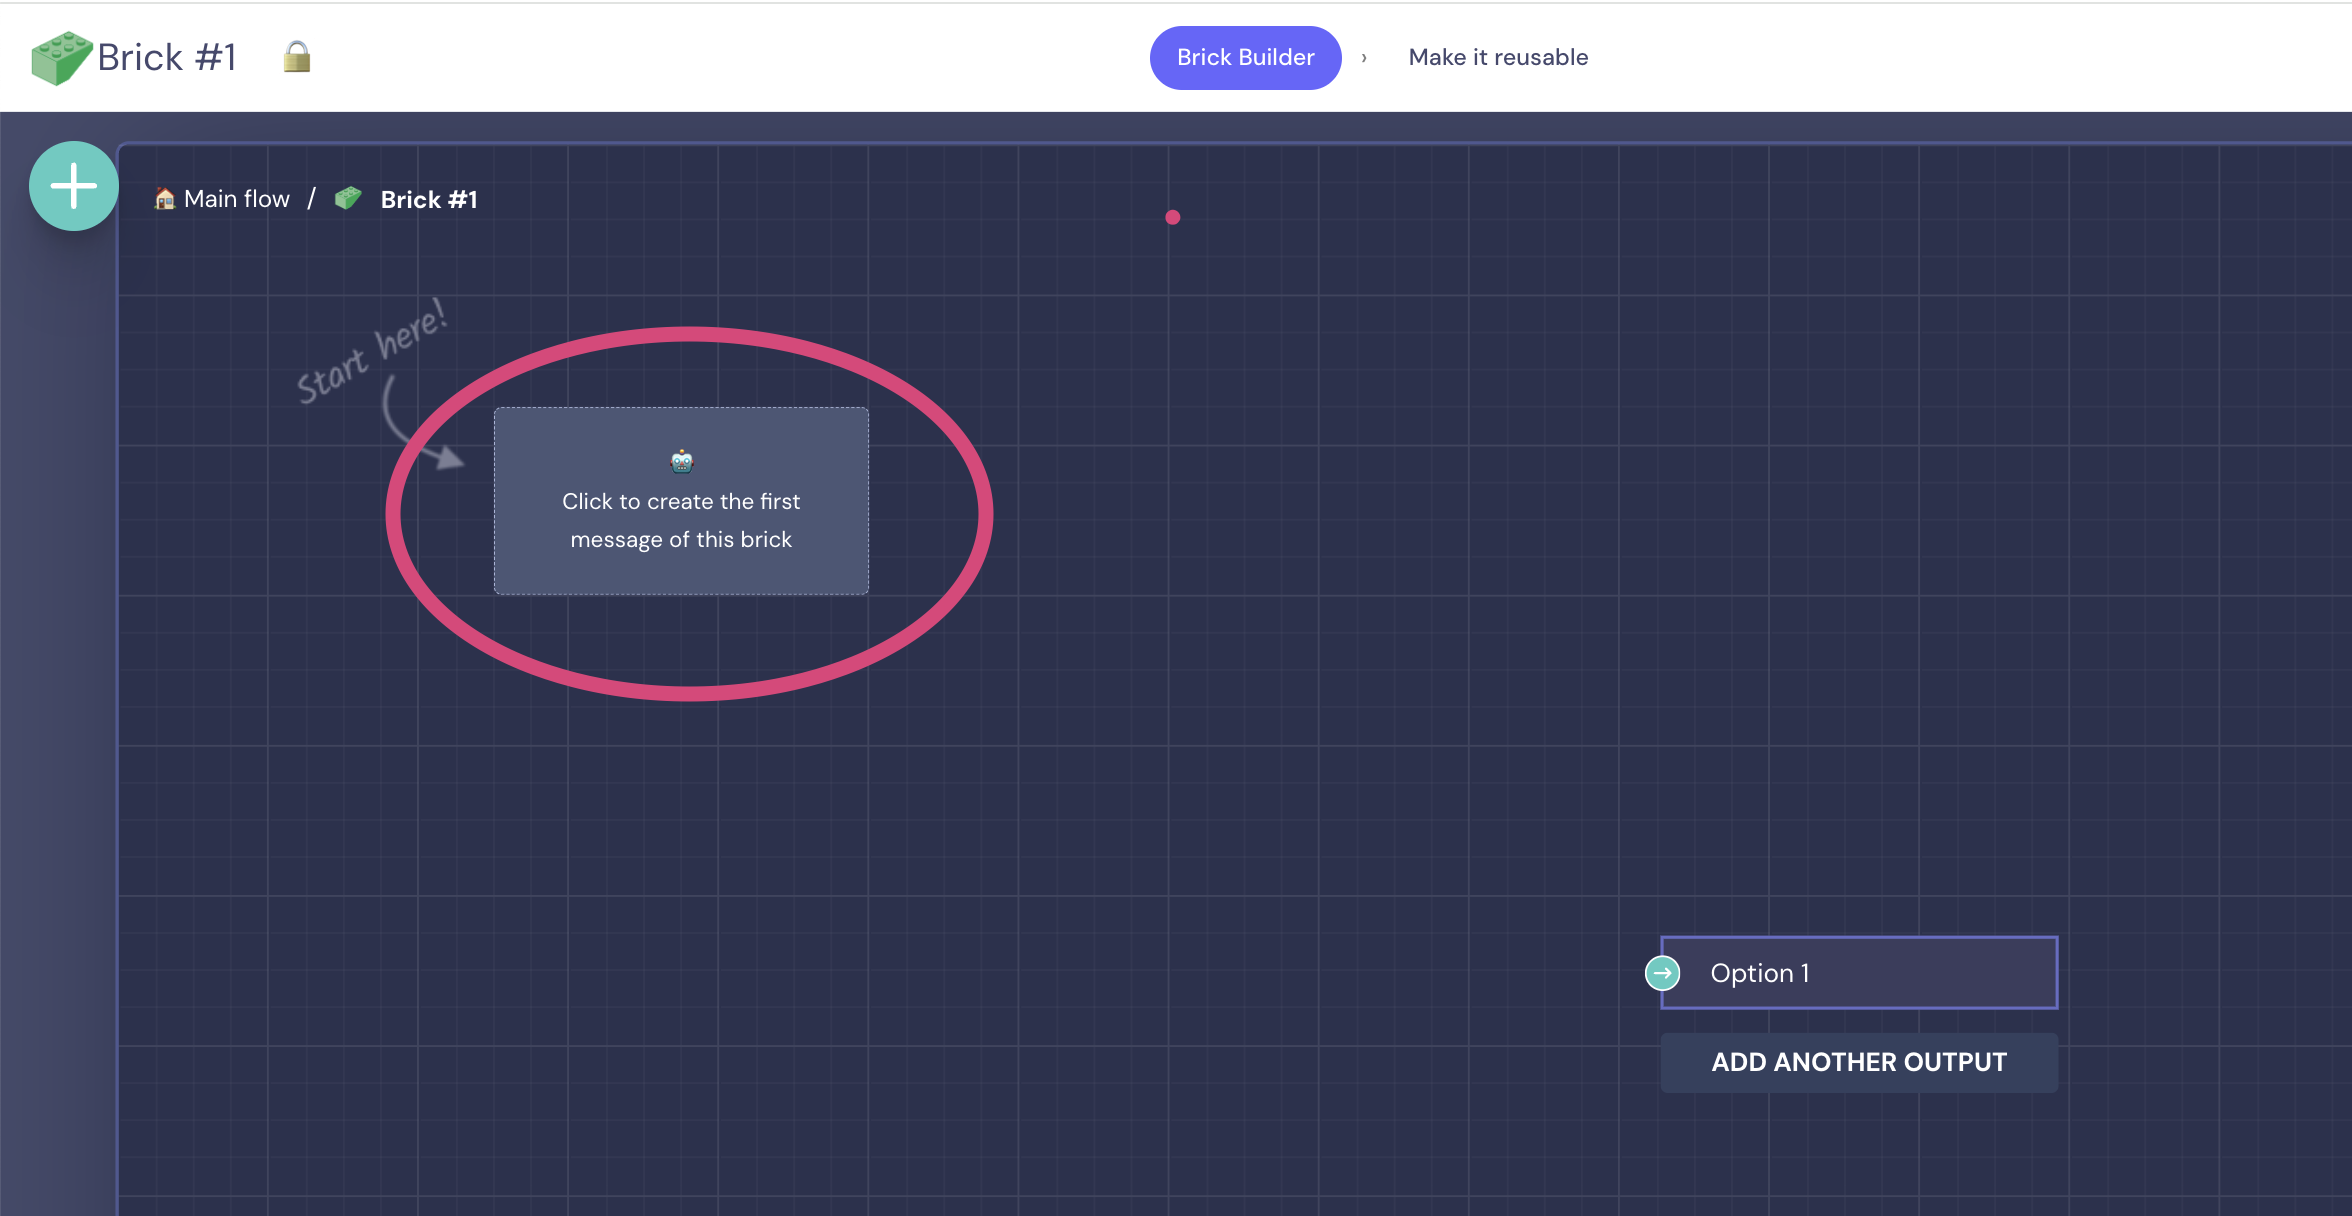
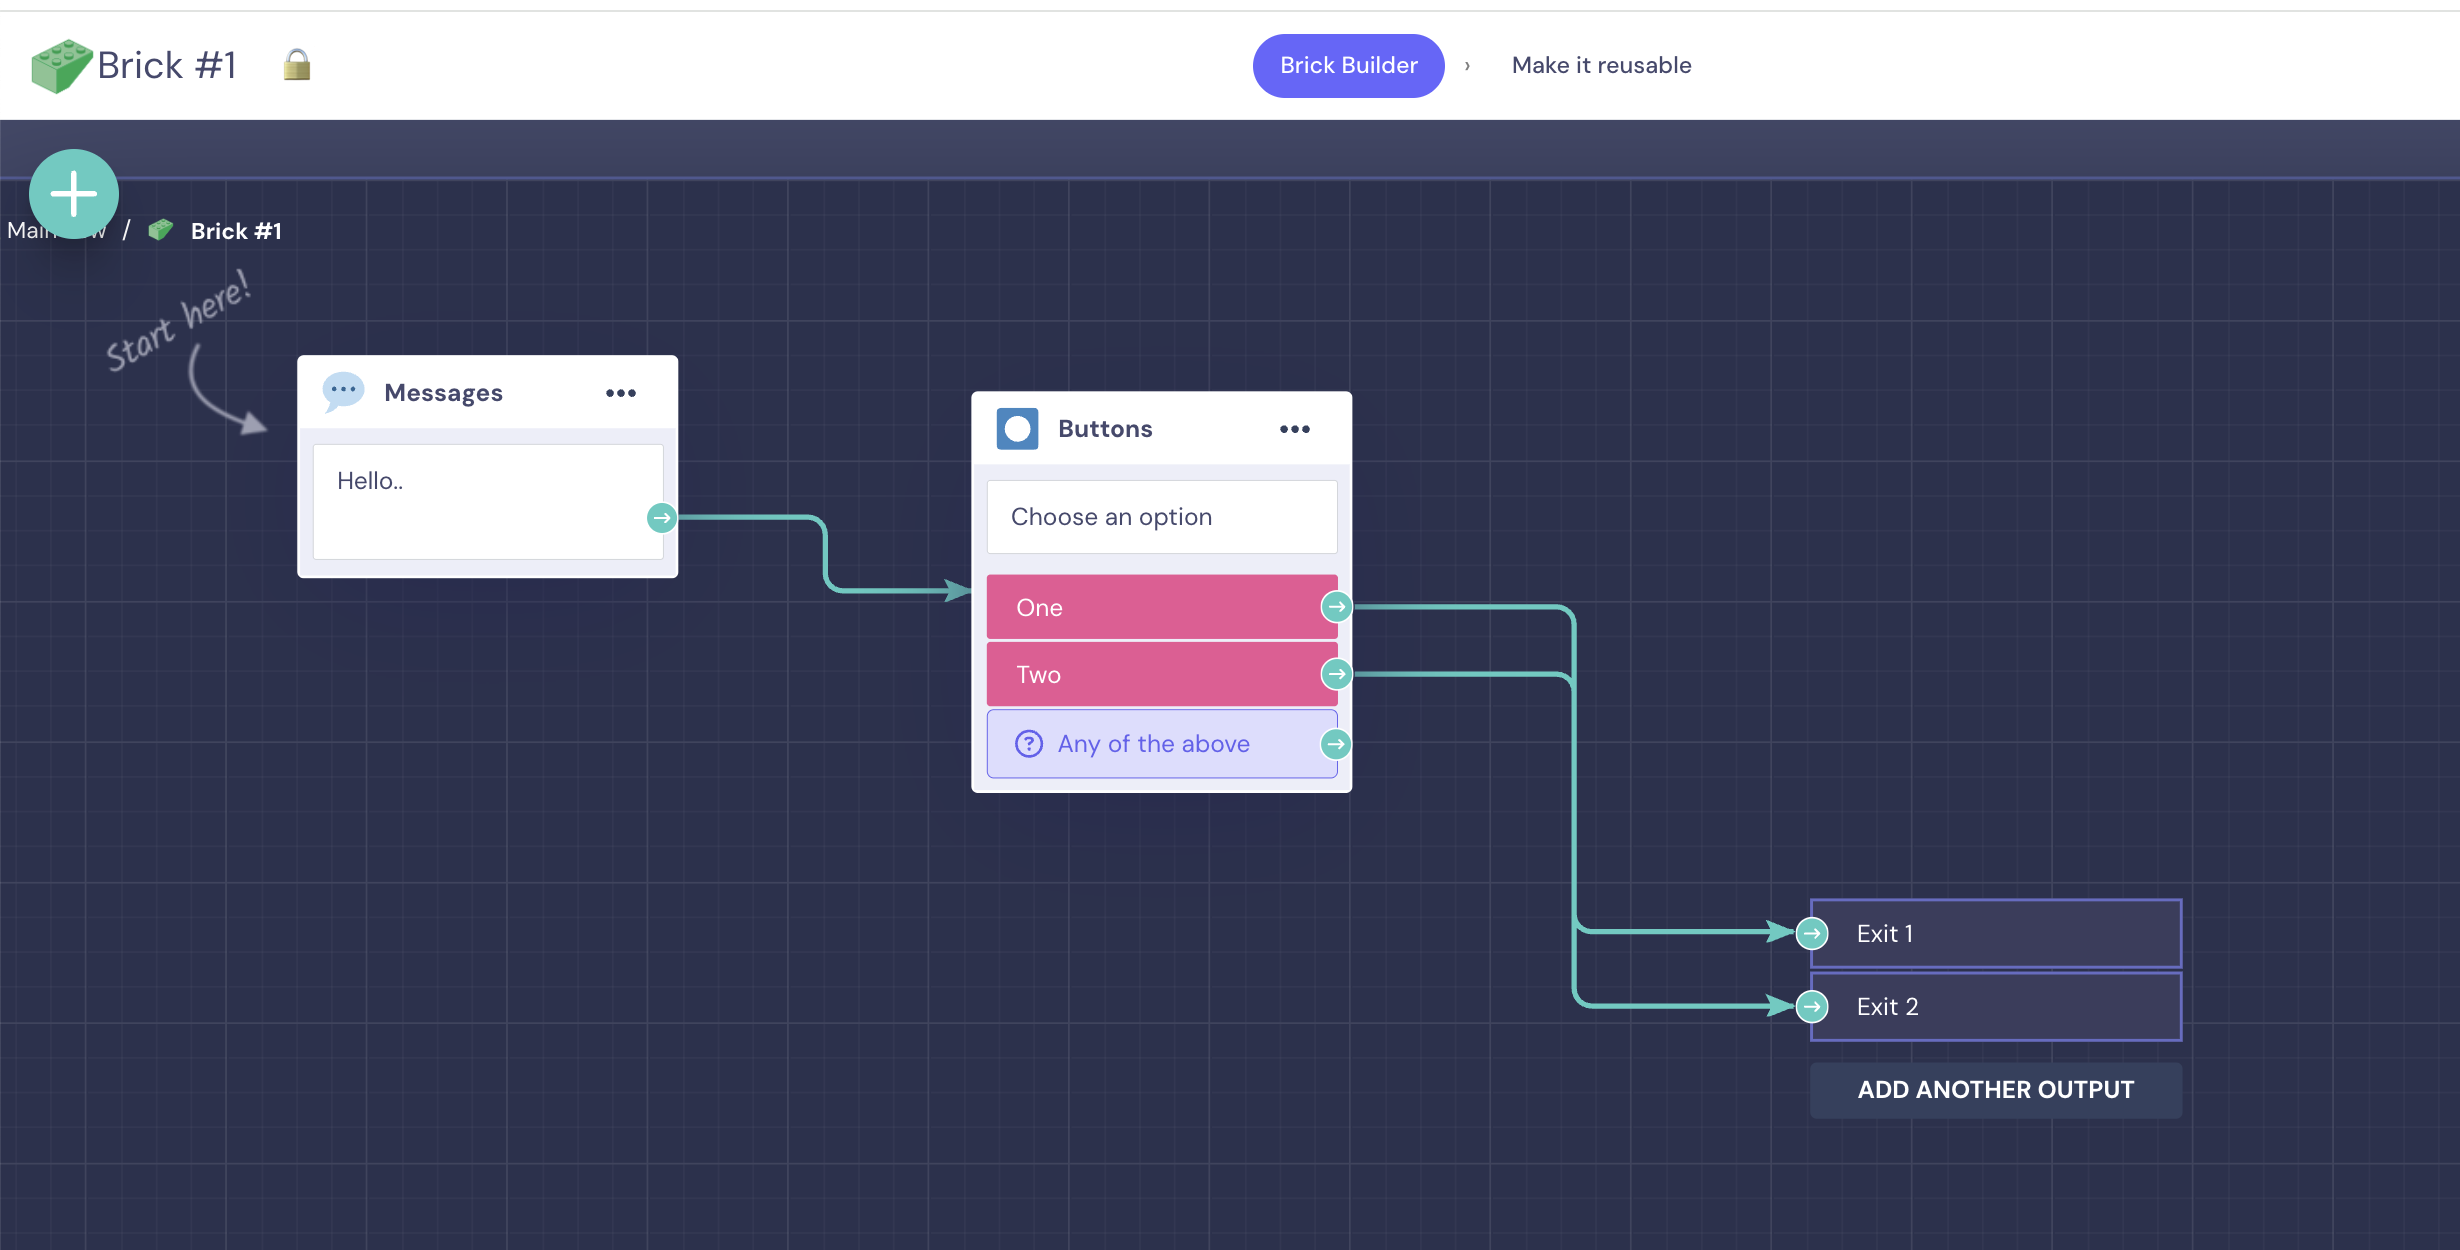
When you enter the brick you'll see that it has two main elements:
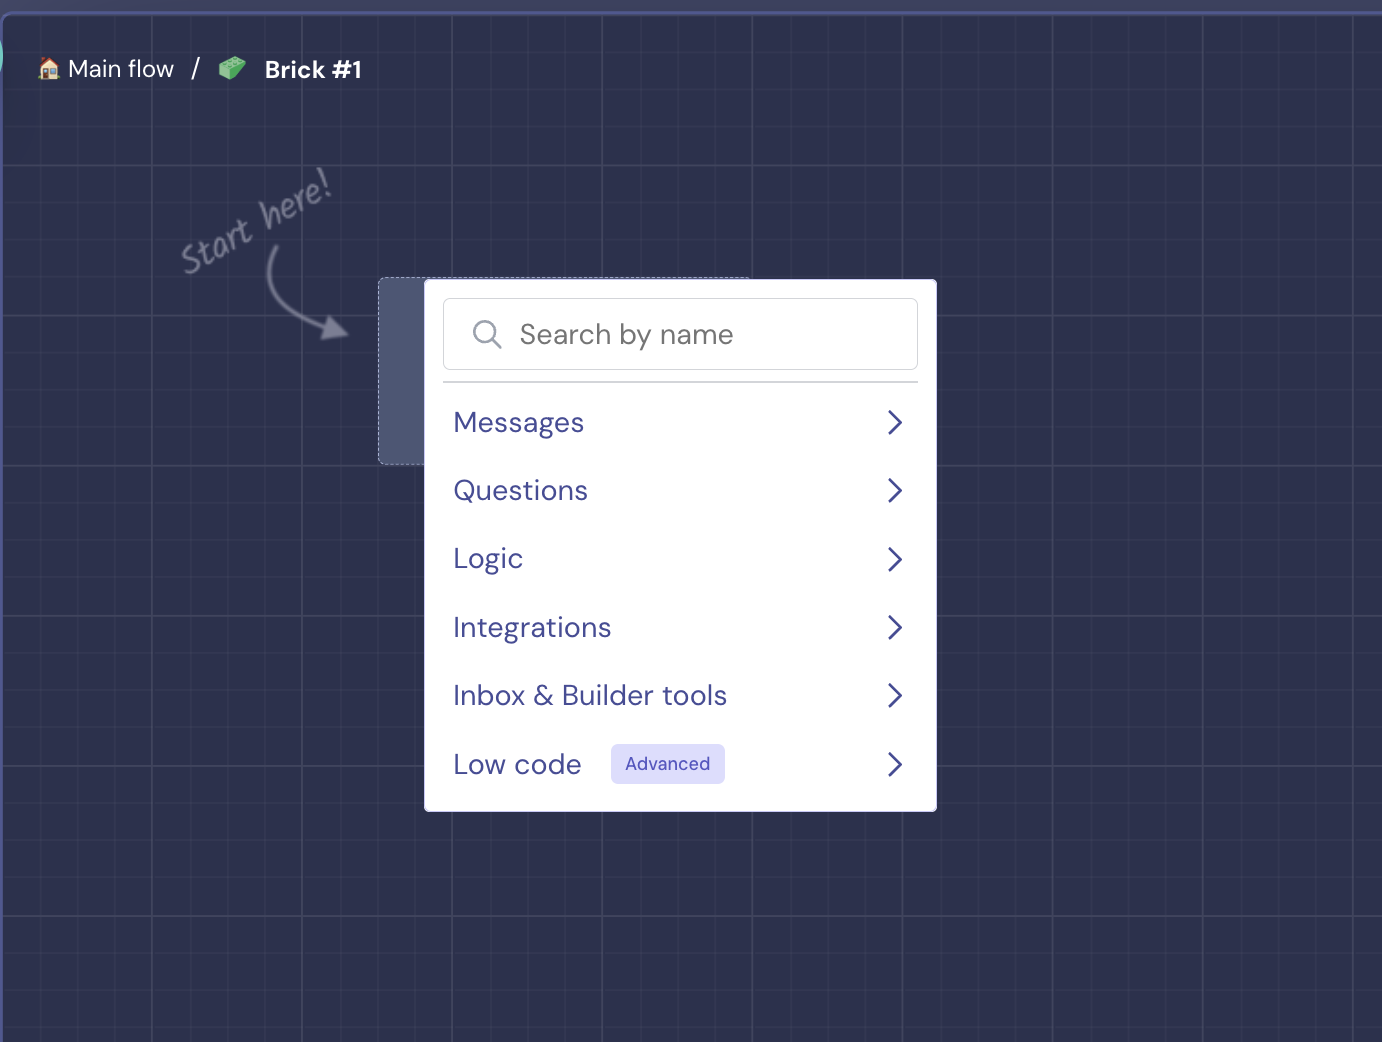
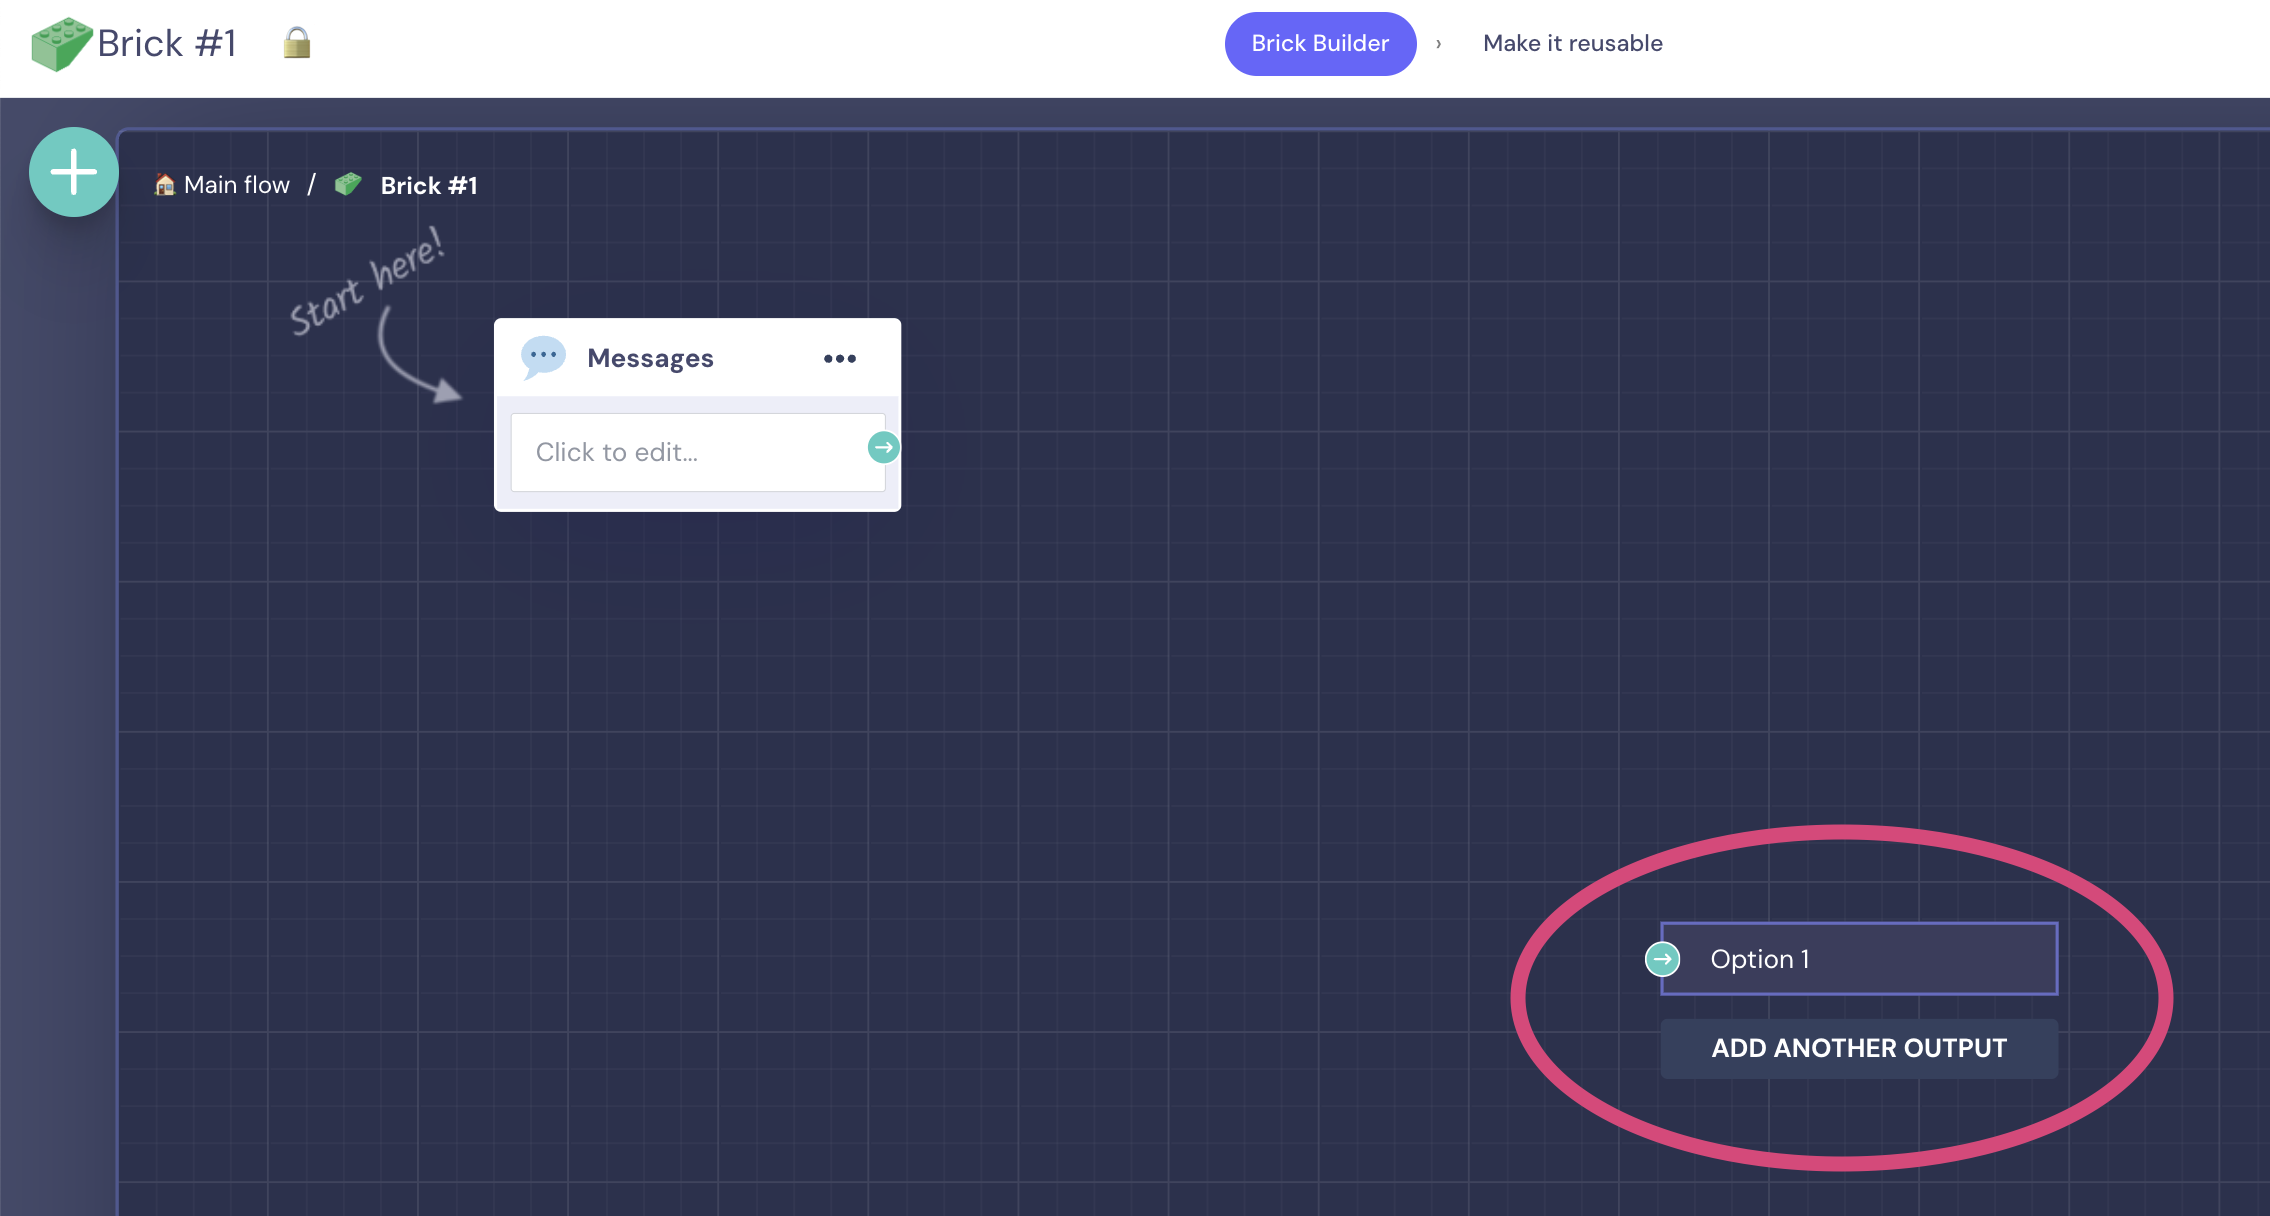
First Message: Click on the signed space to create the first message ("Click to create the first message of this Brick"). The Brick has to start from that point, so you must click on the indicated space to add a new block.
You will be able to select most blocks in the dropdown that will open
Output: You must add an "exit" so that the path leaving the flow inside the Brick can be connected to the main flow. Each exit point of the Brick is called an Output.Once you've added the blocks needed, connect the last block to the Output.
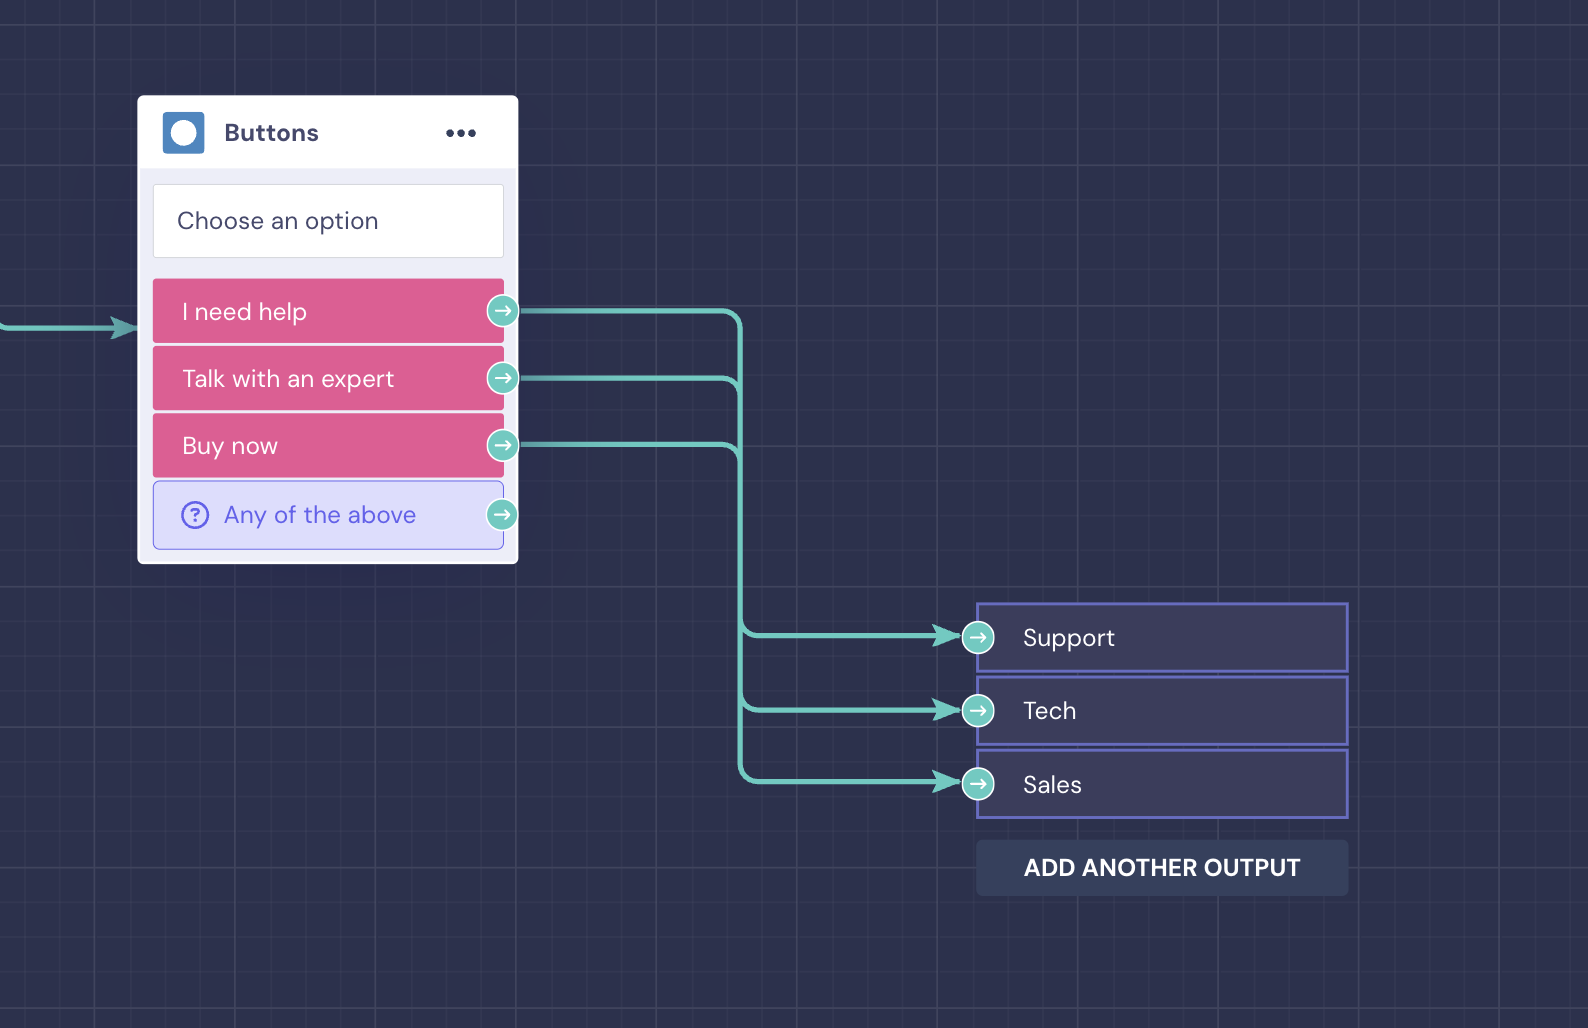
Add moreOutputs: You can add extra Outputs if you have more than one flow inside the same Brick, by clicking on Add another output.
Give a name to each Output: You can change the name of the Output, to make it easier to identify it from the Main flow:
WARNING: The Brick must start in the "Start here" Message and end in the "Output". If you do not set this up correctly, the Brick will not work.
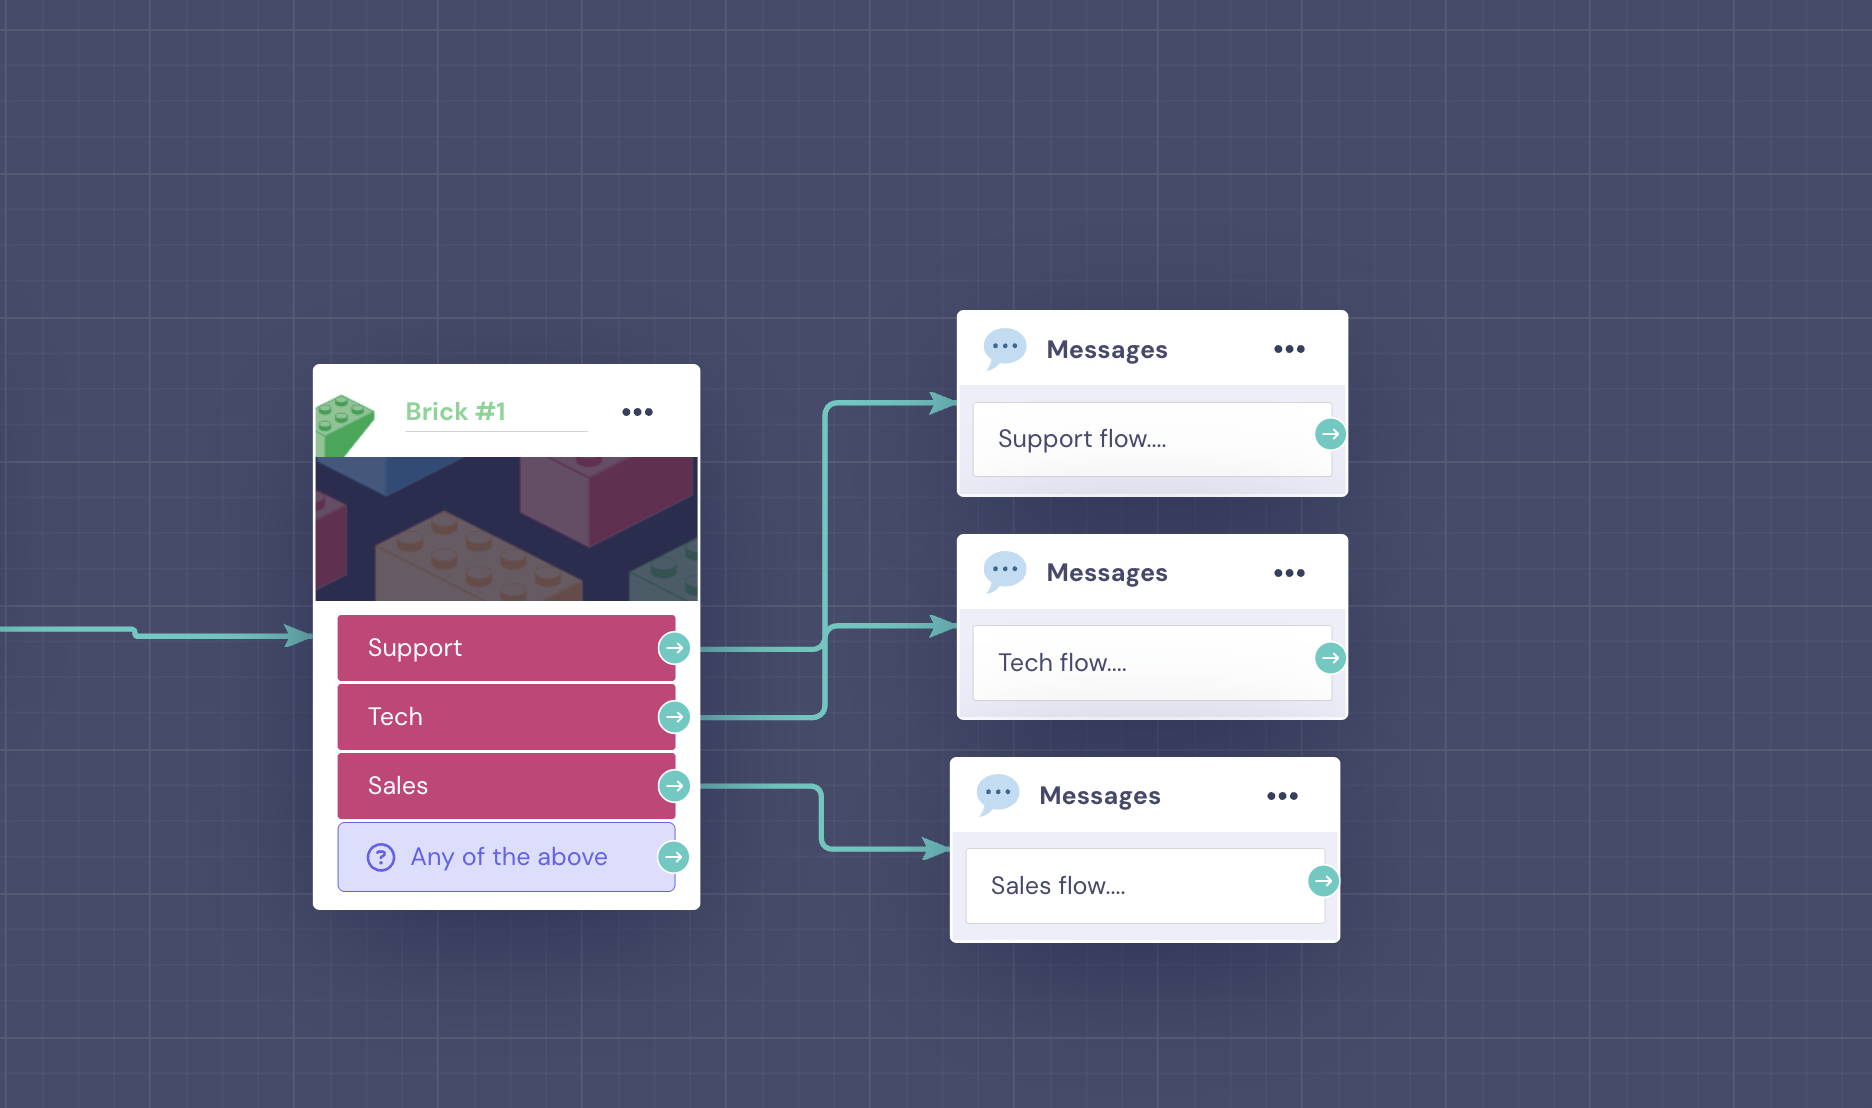
Back to the bot: Once you're done, click on Back to bot in the top-right corner to move back to the original flow:
As you can see, three Outputs are created. Remember to connect every Output to a block in the main flow to make sure the bot flow continues.
How to create a Brick from aGroup of blocks
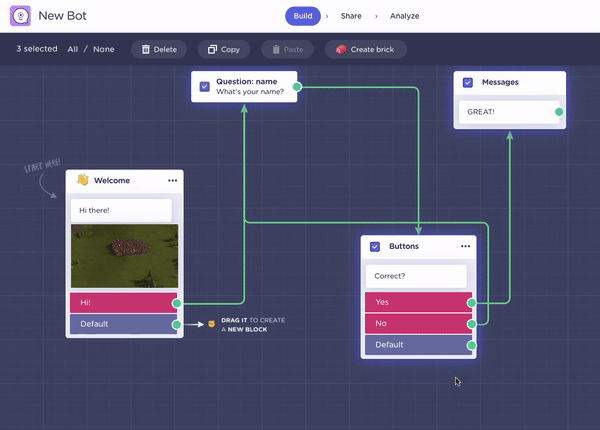
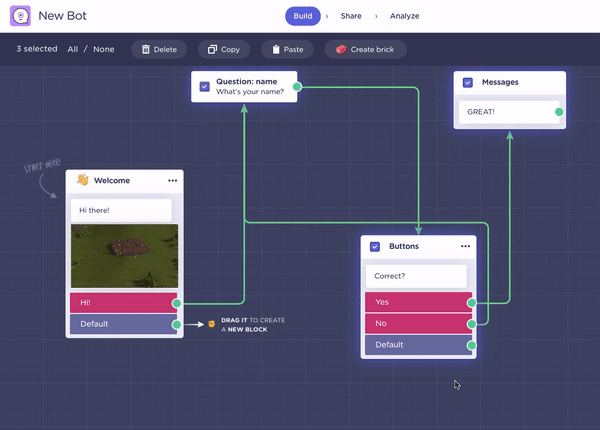
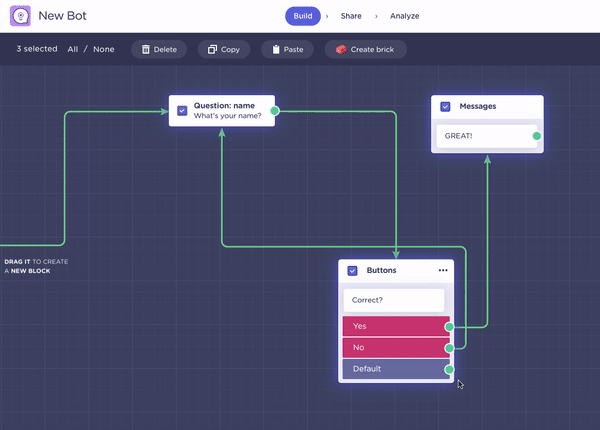
It'sa possible to create a Brick out of a group of blocks we already have in the bot flow, by selecting these blocks and adding them to a Brick.
Simply select the blocks and click on Create Brick, which appears on the bar on the top of your bot when you select the blocks.
NOTE: It is not possible to "UNDO" a Brick.
But you can copy the blocks from inside the Brick and Paste them in the main bot flow to do this.
Select, Unselect, or Delete a Group of blocks
How to Select a group of blocks
You can select more than one block, just by marking the box it in the top left corner.
How to unselect a group of blocks
In case we are done with the selection, we just need to click on NONE.
Delete a group of Blocks
In case we need to delete a group of Blocks, just select as many as you want to and click Delete on the top bar.
Copy and Paste a group of blocks
Copy a group of Blocks
This is handy when you want to create another flow or repeat many blocks at once.
Paste a group of Blocks
You can paste previously copied blocks in two ways
From the Top menu: just click on Paste and the block will be pasted on the right side of the flow.
Right button in Mouse/Trackpad: Instead of using the top bar, you can just click with the right button of your mouse/trackpad to see the option to copy and paste.
Create a Brick from selected blocks
If you are not sure how to select a group of blocks, please see the steps above 👆
This is the quickest way to create a brick, without the need to start from scratch.
However, you have to be aware of 2 things:
The connections (arrows) coming to the blocks will disappear, and this action cannot be undone, so you will need to reconnect the Brick.
Once the Brick is created you need to create a start message from scratch. Create the first block by clicking on the First message of the Brick, and connect this first message to the rest of the flow from the Brick.
Bricks Workarounds
We have created some Workarounds and included them in Bricks, so that you can just import the Brick Workaround into your bot and adapt it to your case.
You can check out all the information about them in this article 🚀
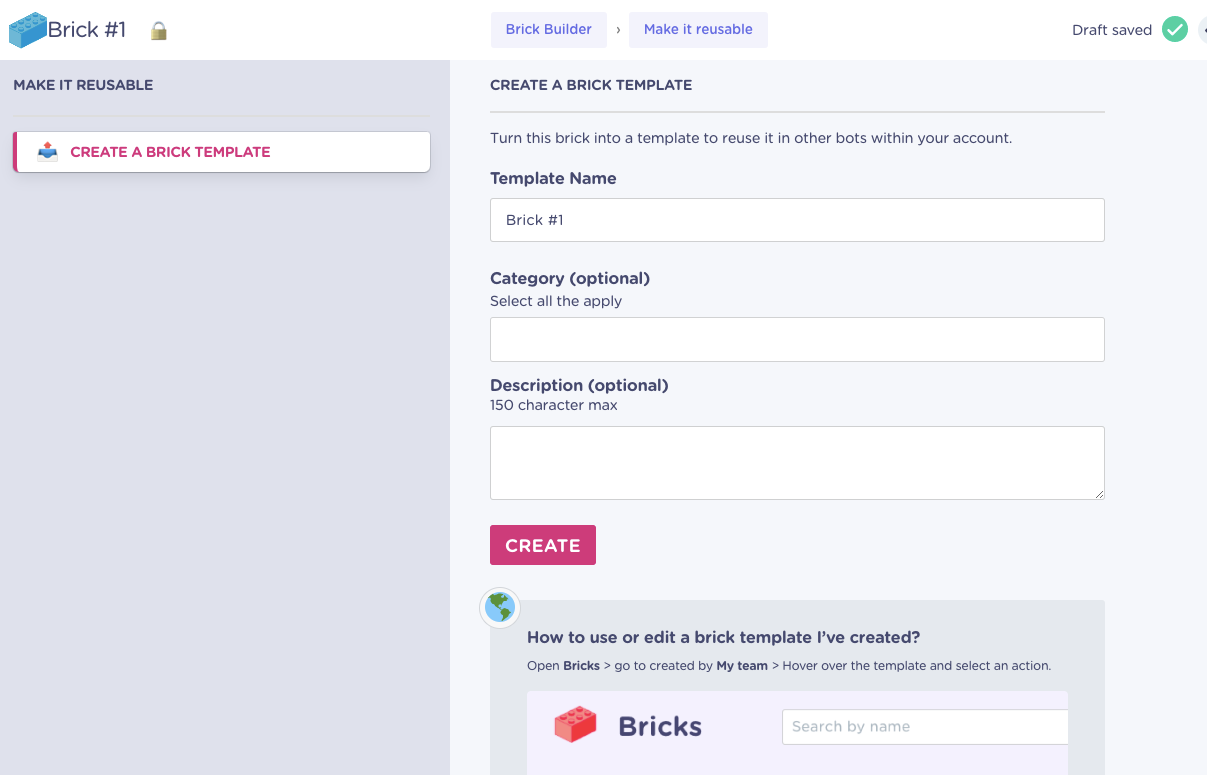
Brick Templates
It is also possible to create a Template out of a Brick you have created, and import this Brick Template into your bot or other bots from your account.
Please check out this article to see how to do this.